简介
- 简介
- Windows 安装 Linux子系统
- windows下小代码
Windows 安装 Linux子系统
打开设置并点击 更新与安全
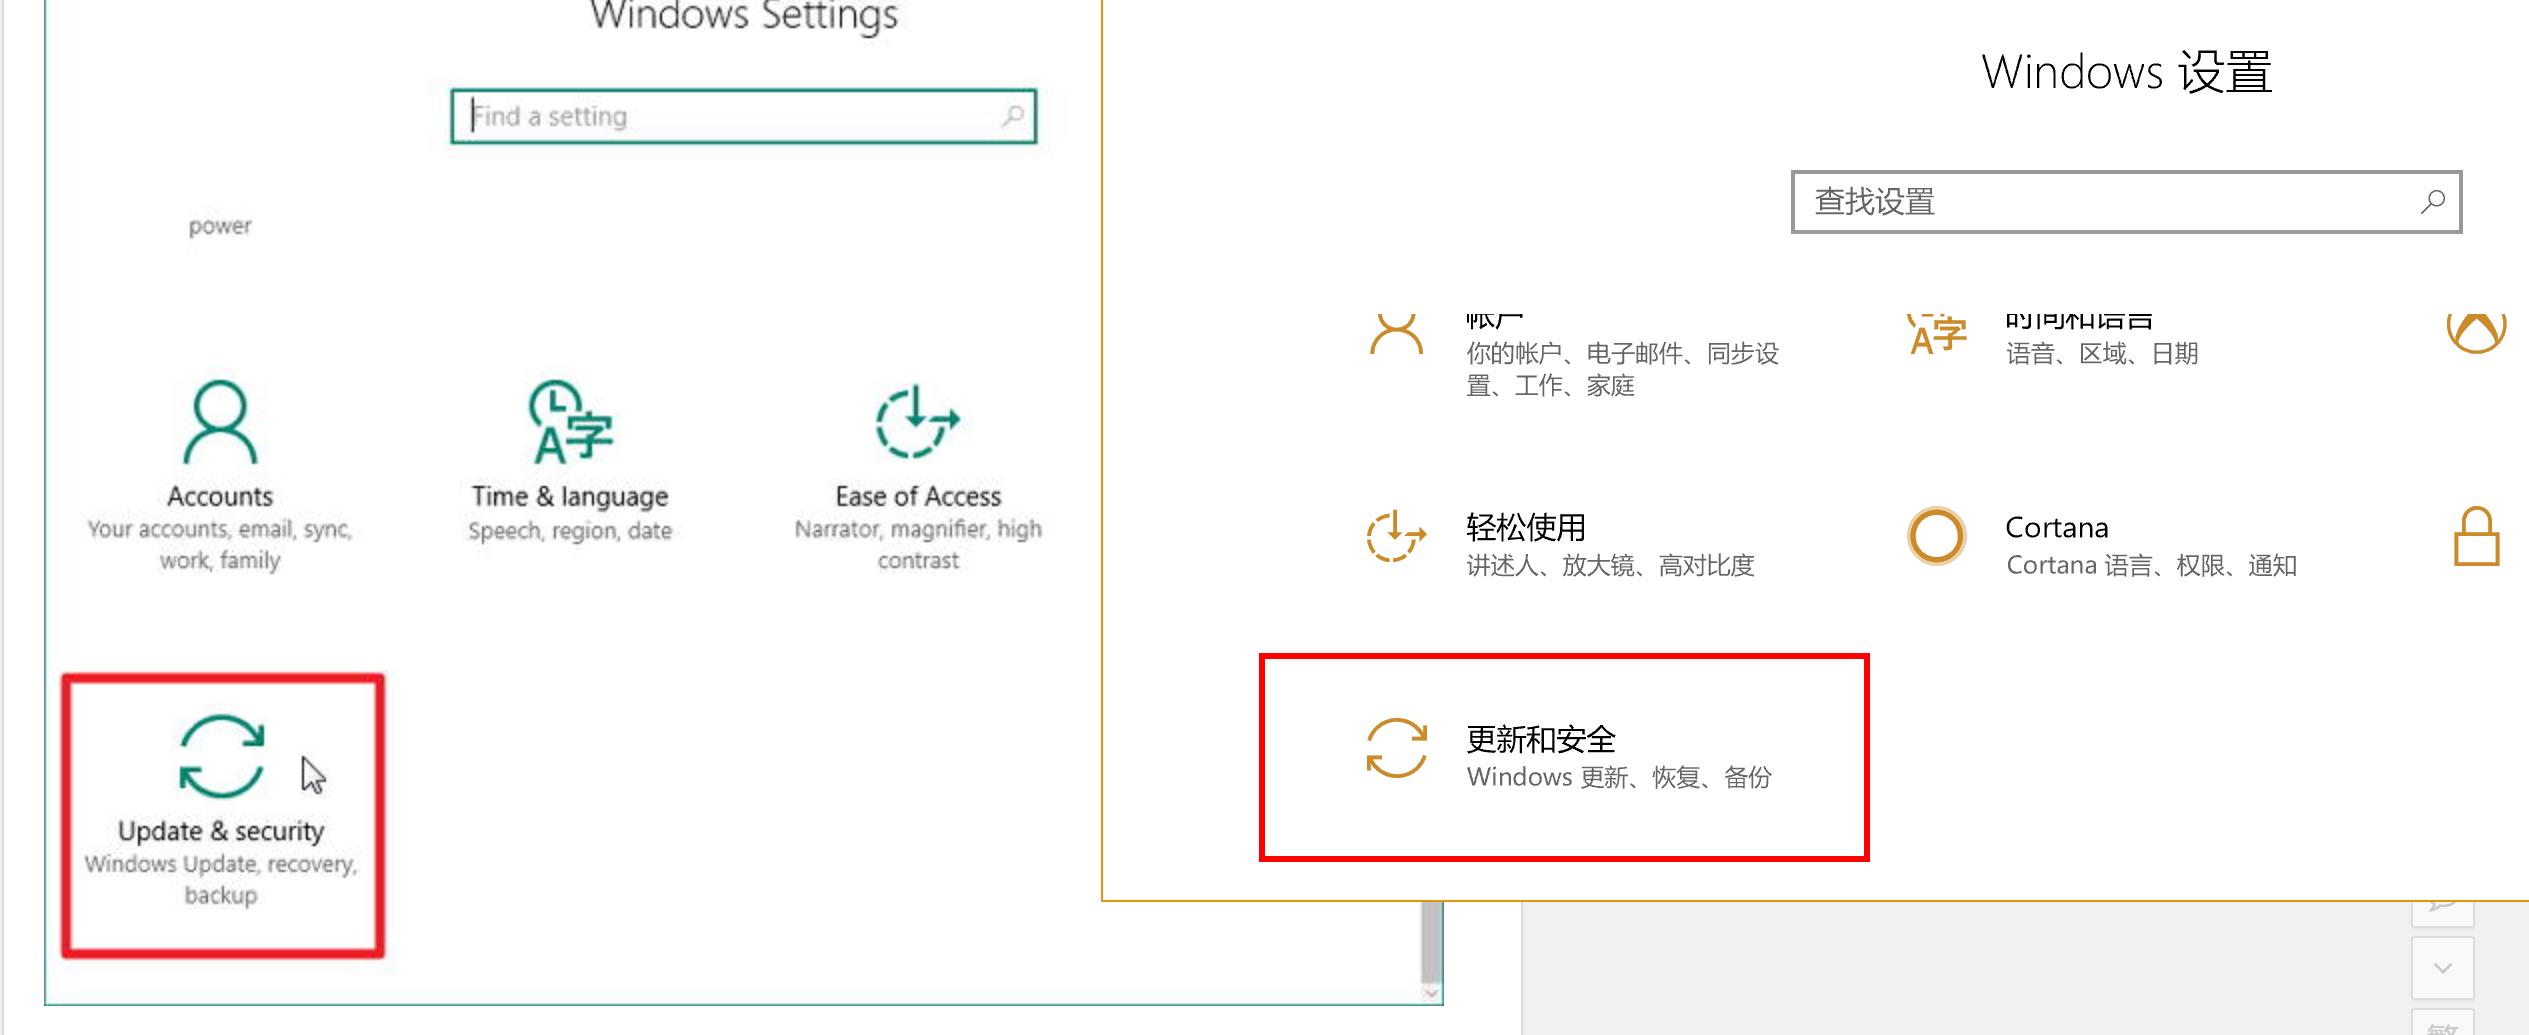
快捷键: Win + i // 快速打开win10设置窗口
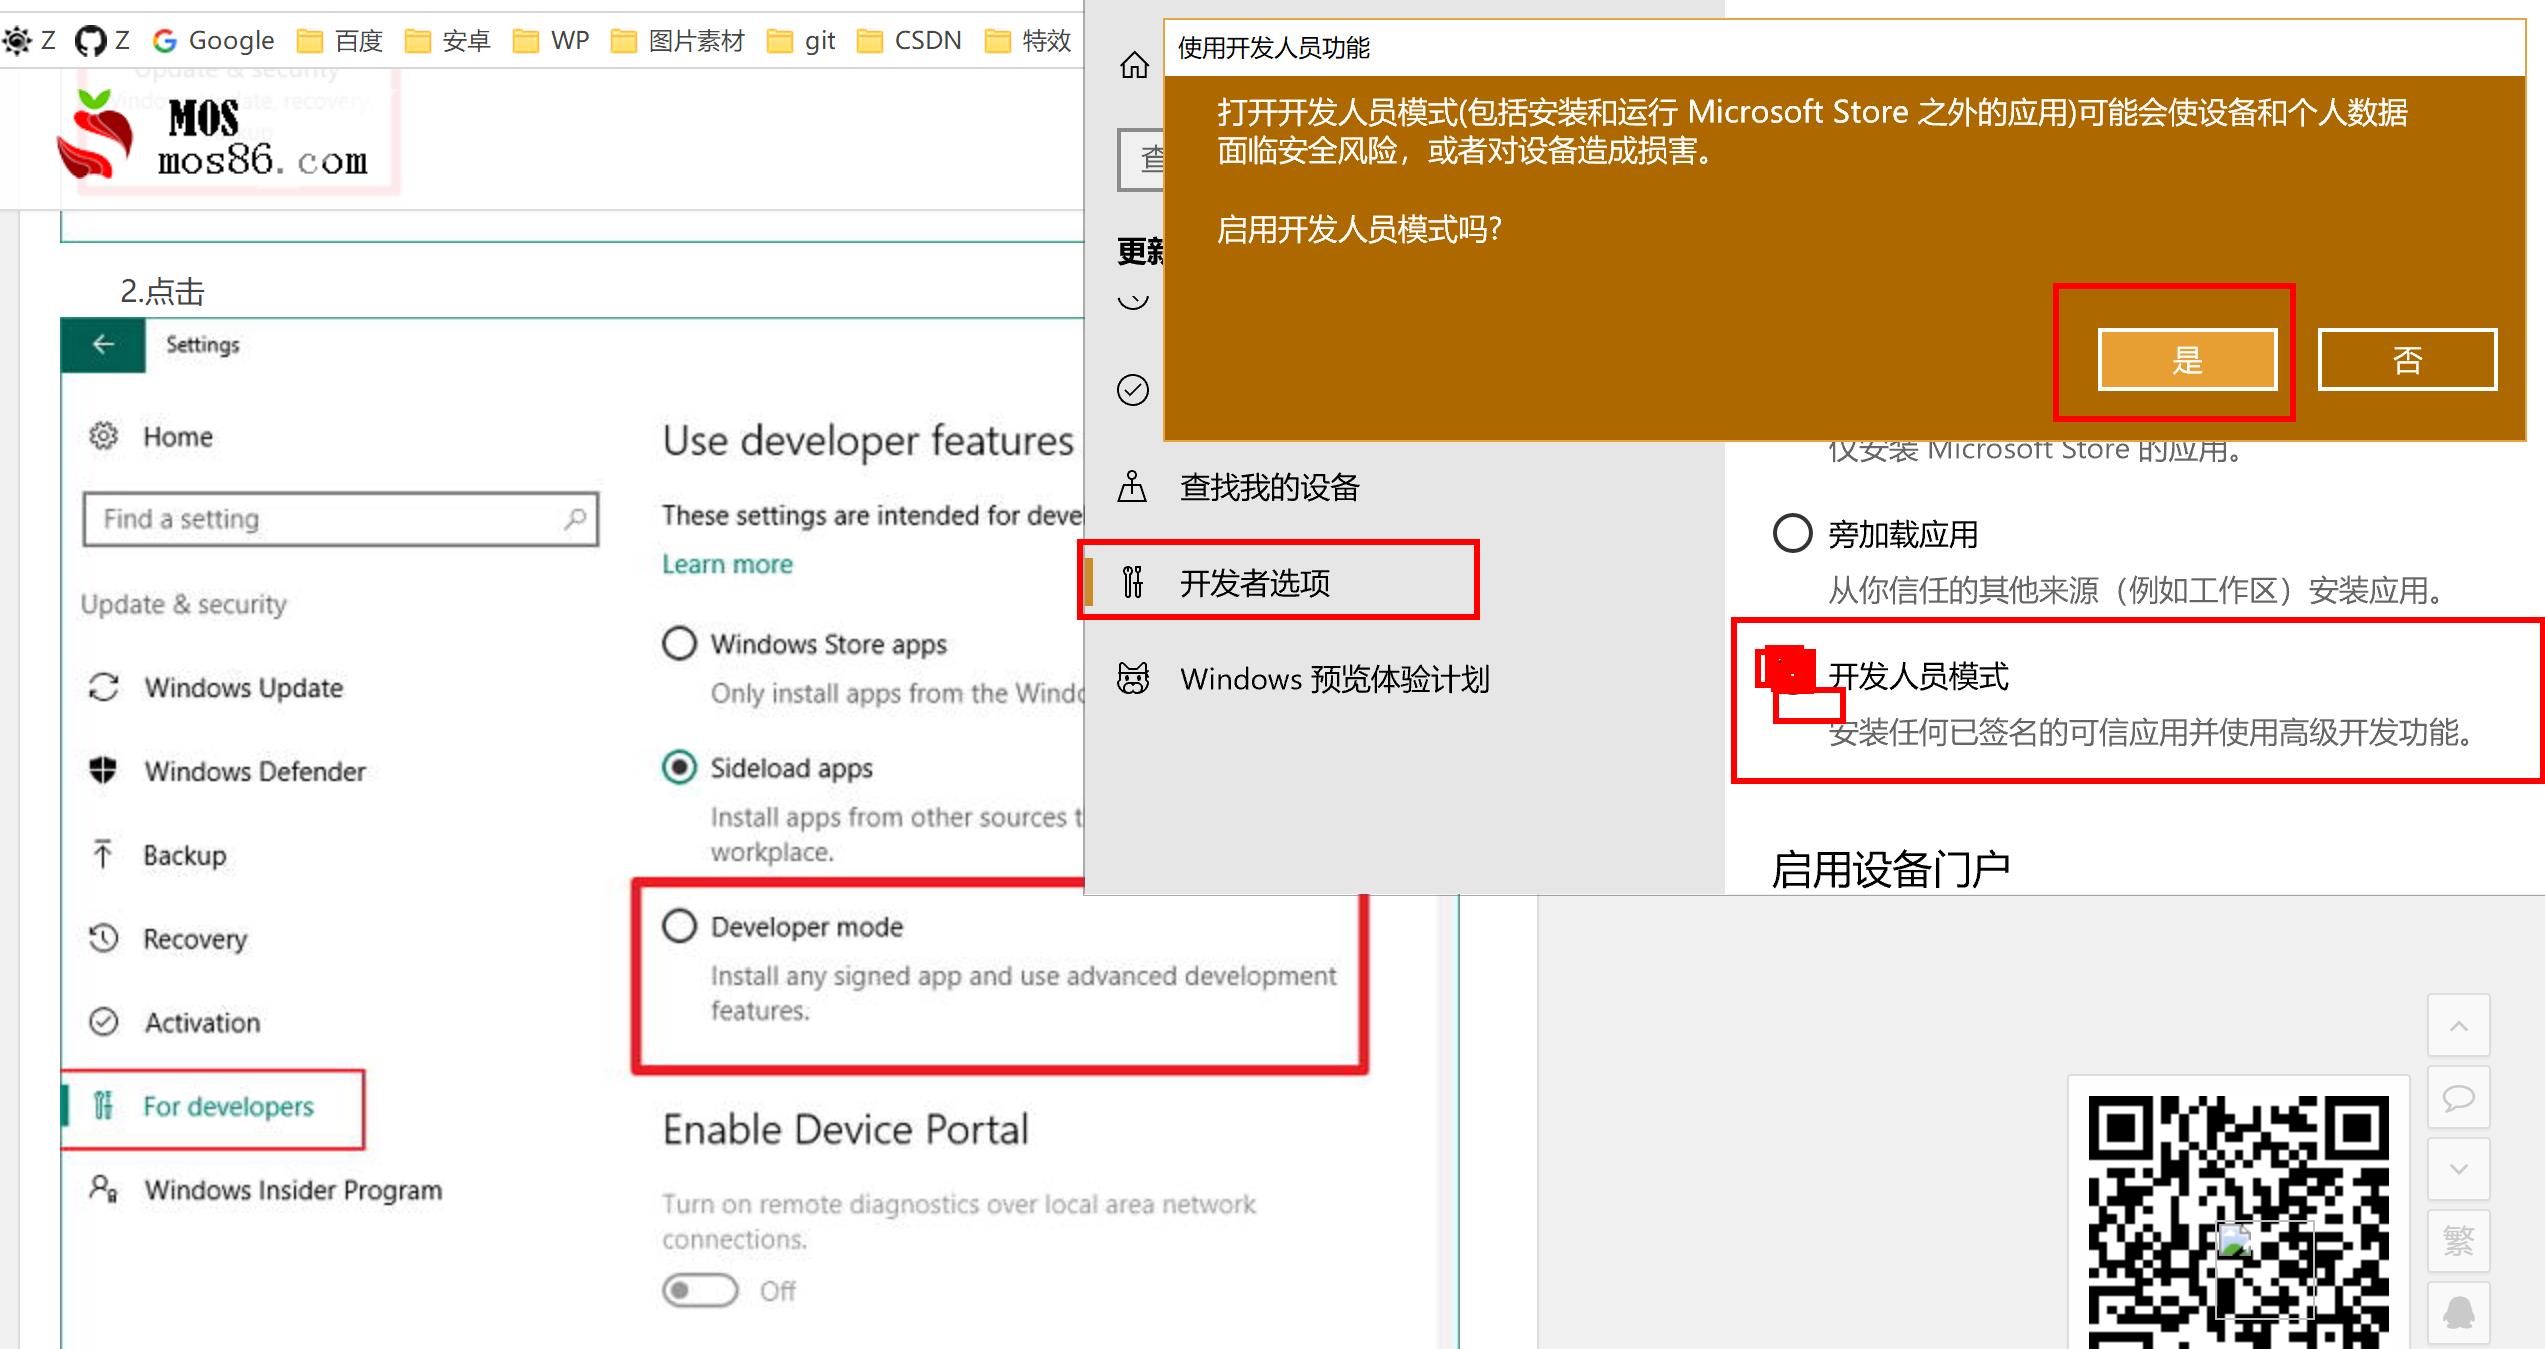
开发人员选项 》 开发者模式
控制面板(小图标)》程序与功能
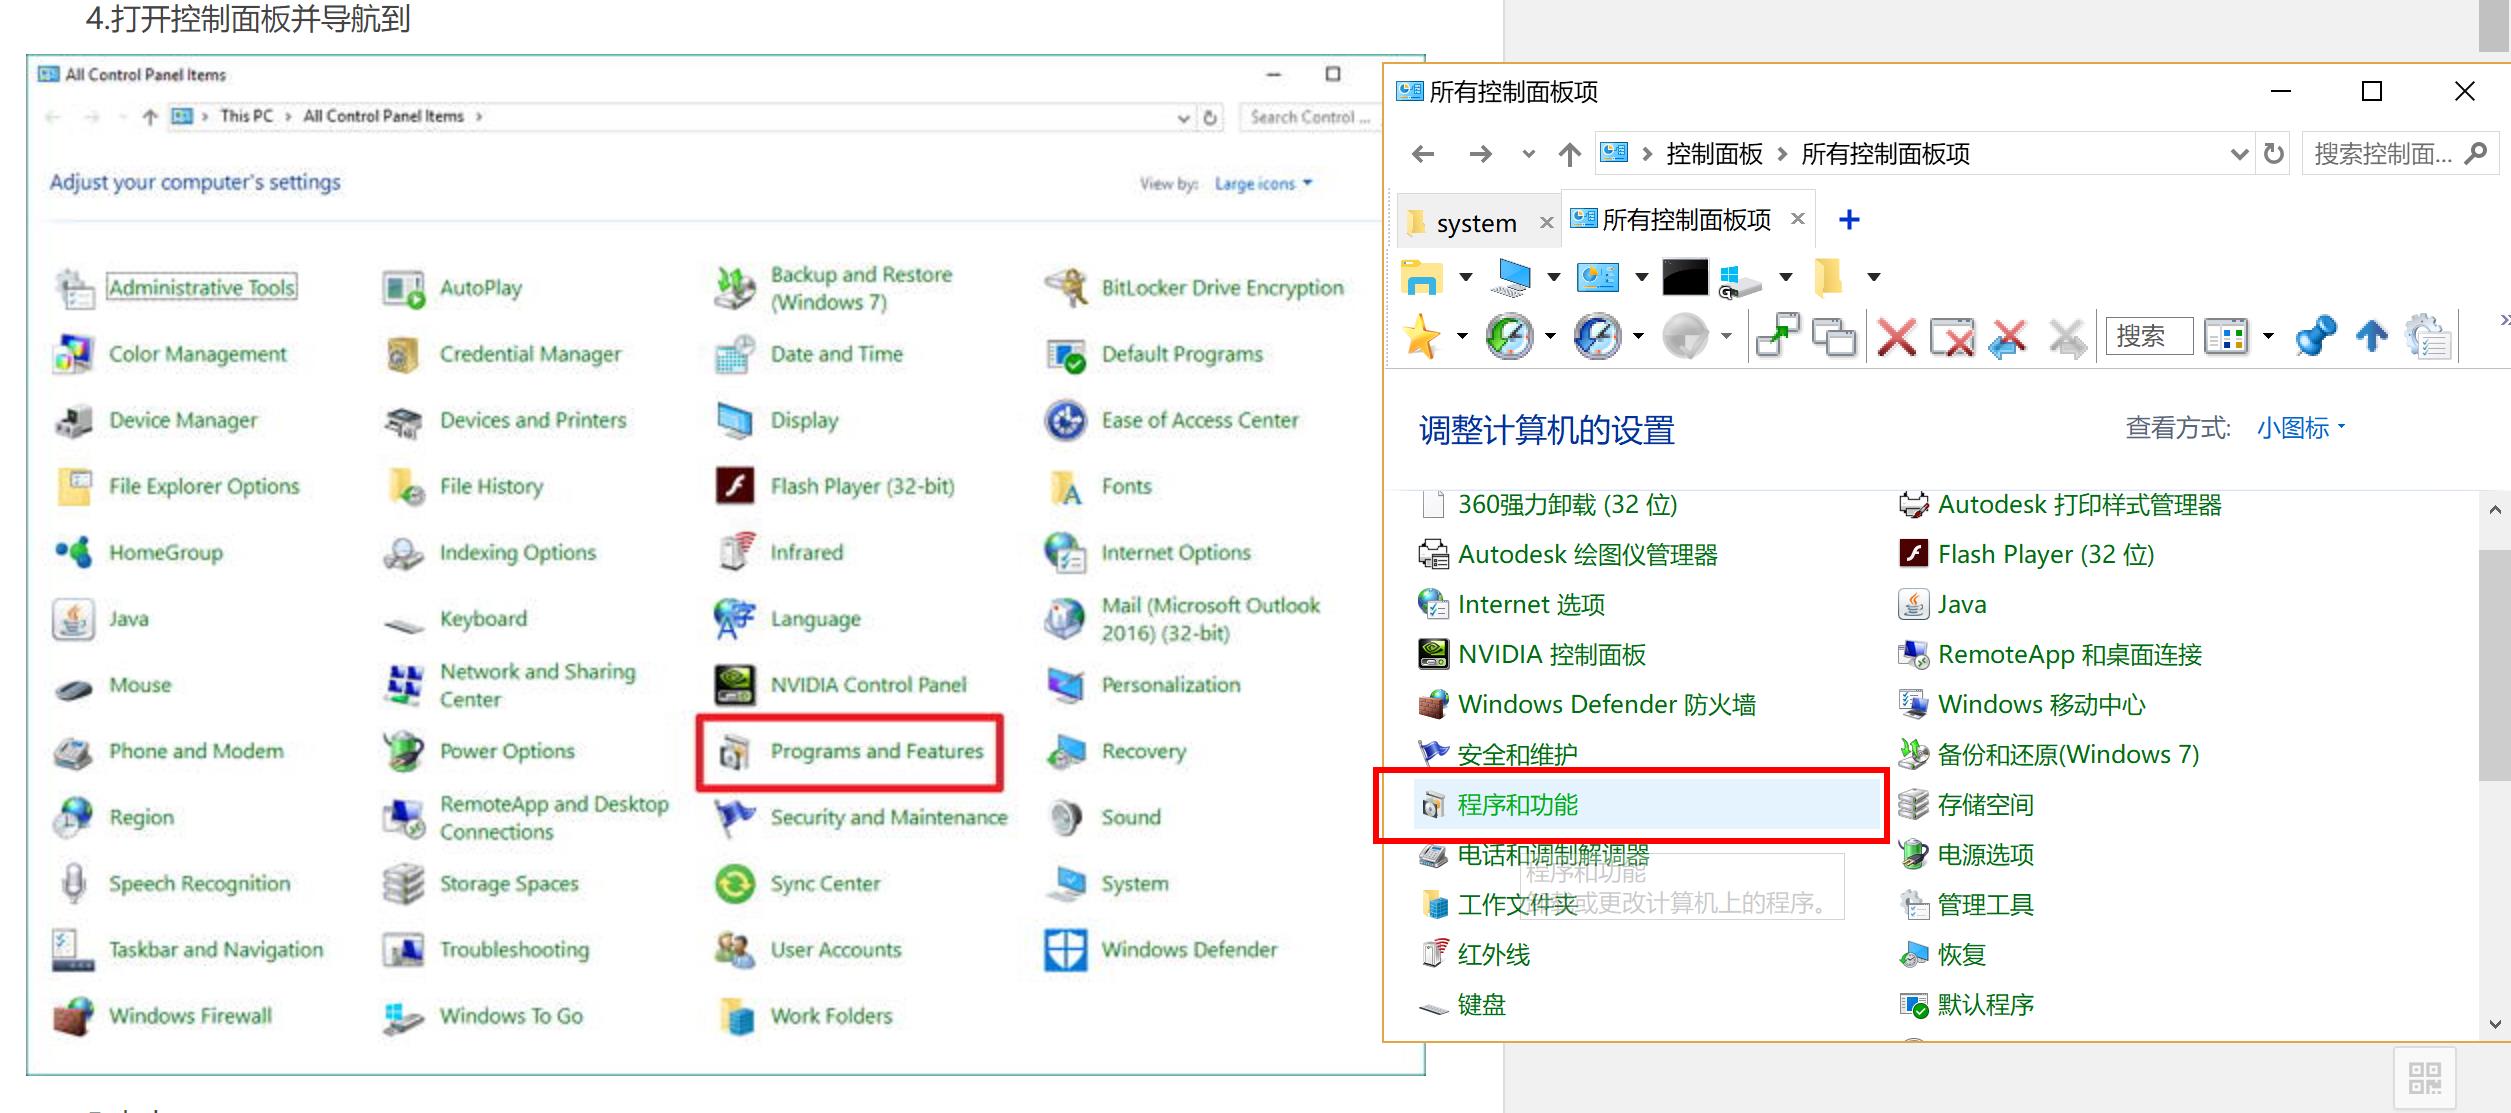
Win +  R    // 打开运行输入框
control          // 输入 control  打开控制面板
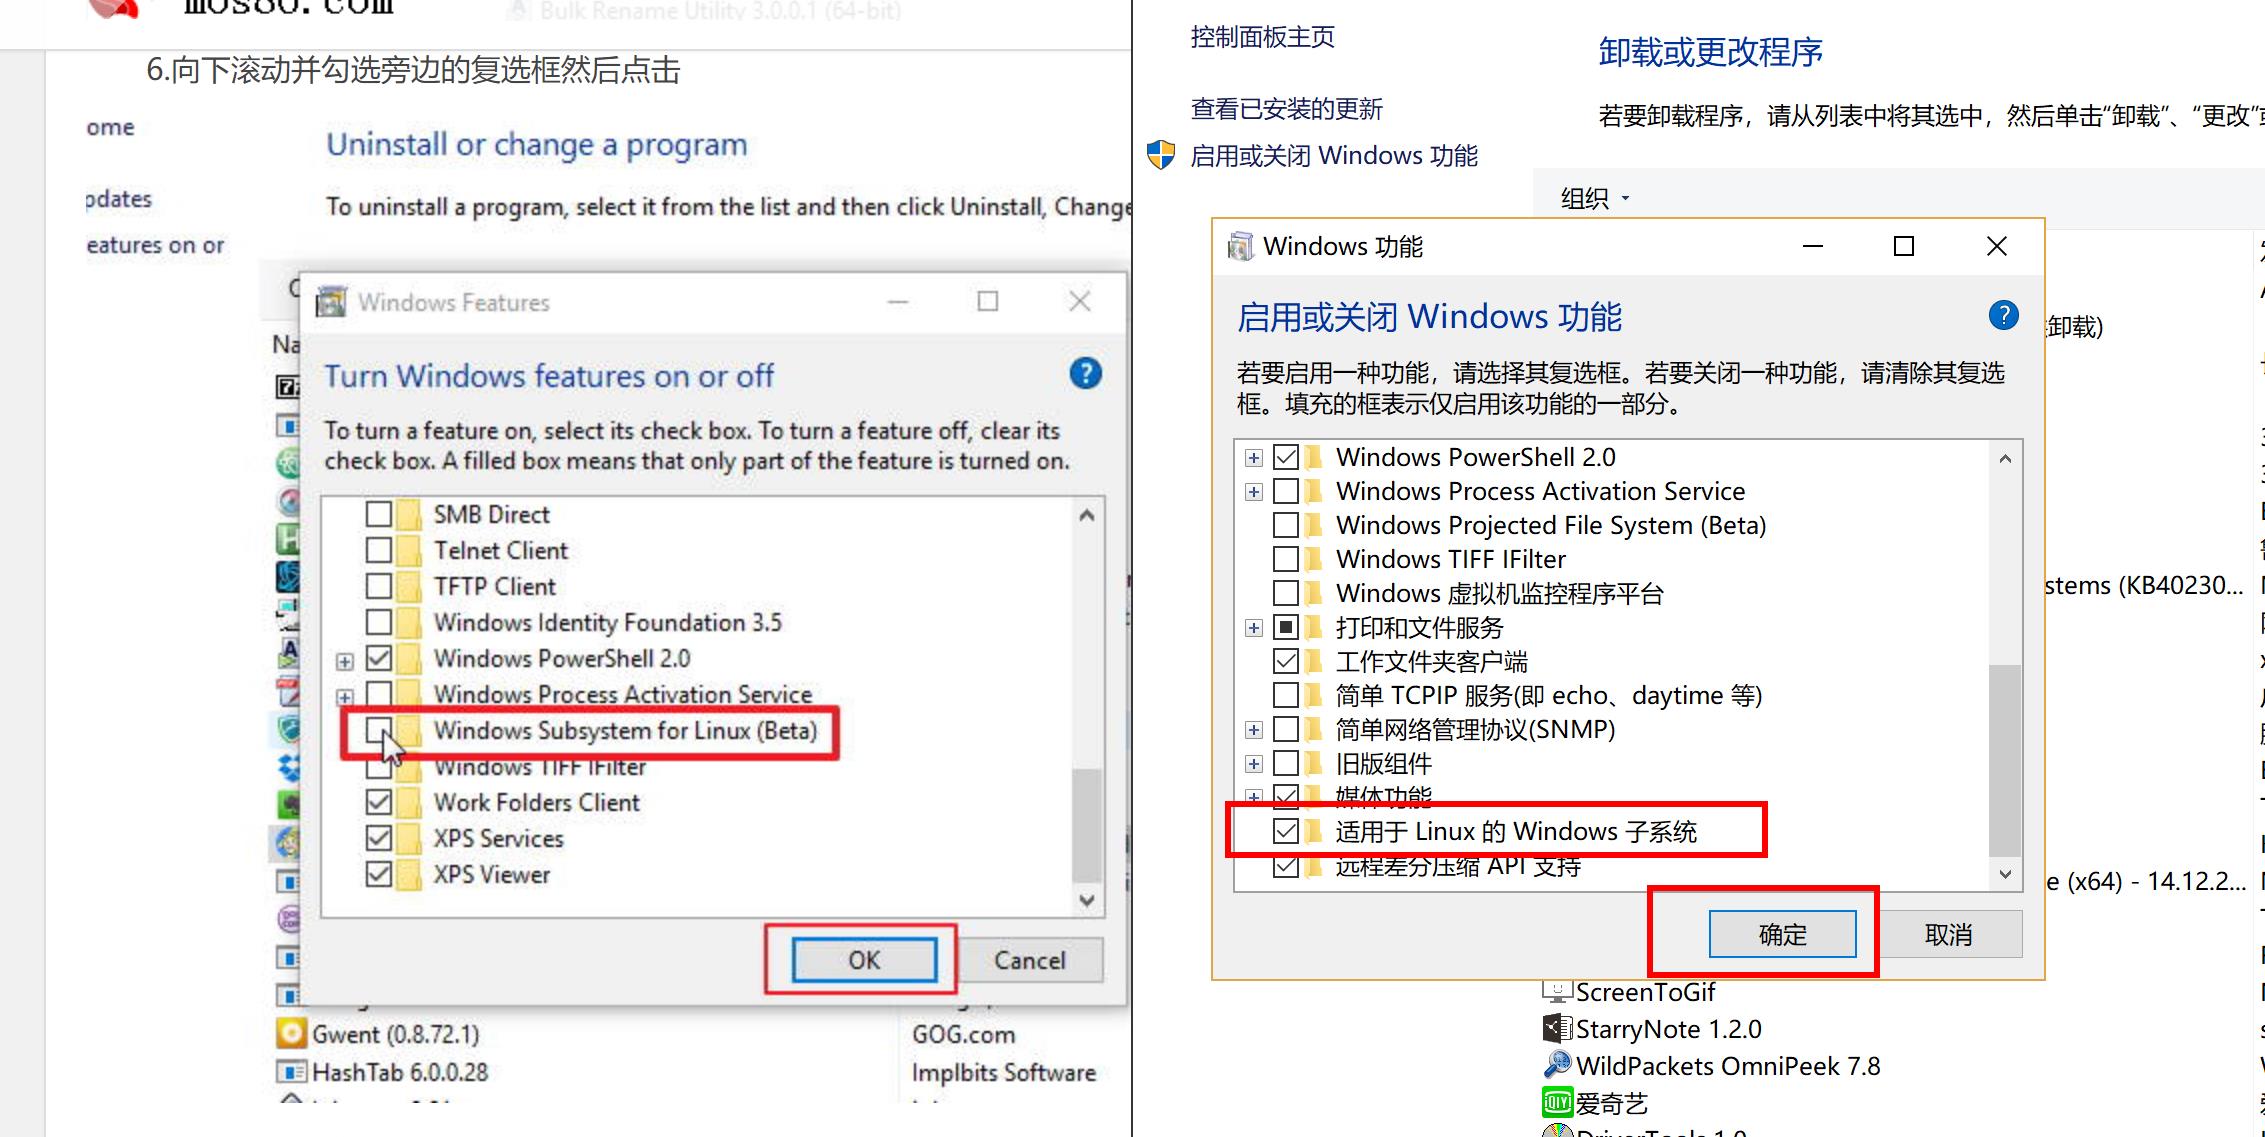
点击启动或关闭windows功能
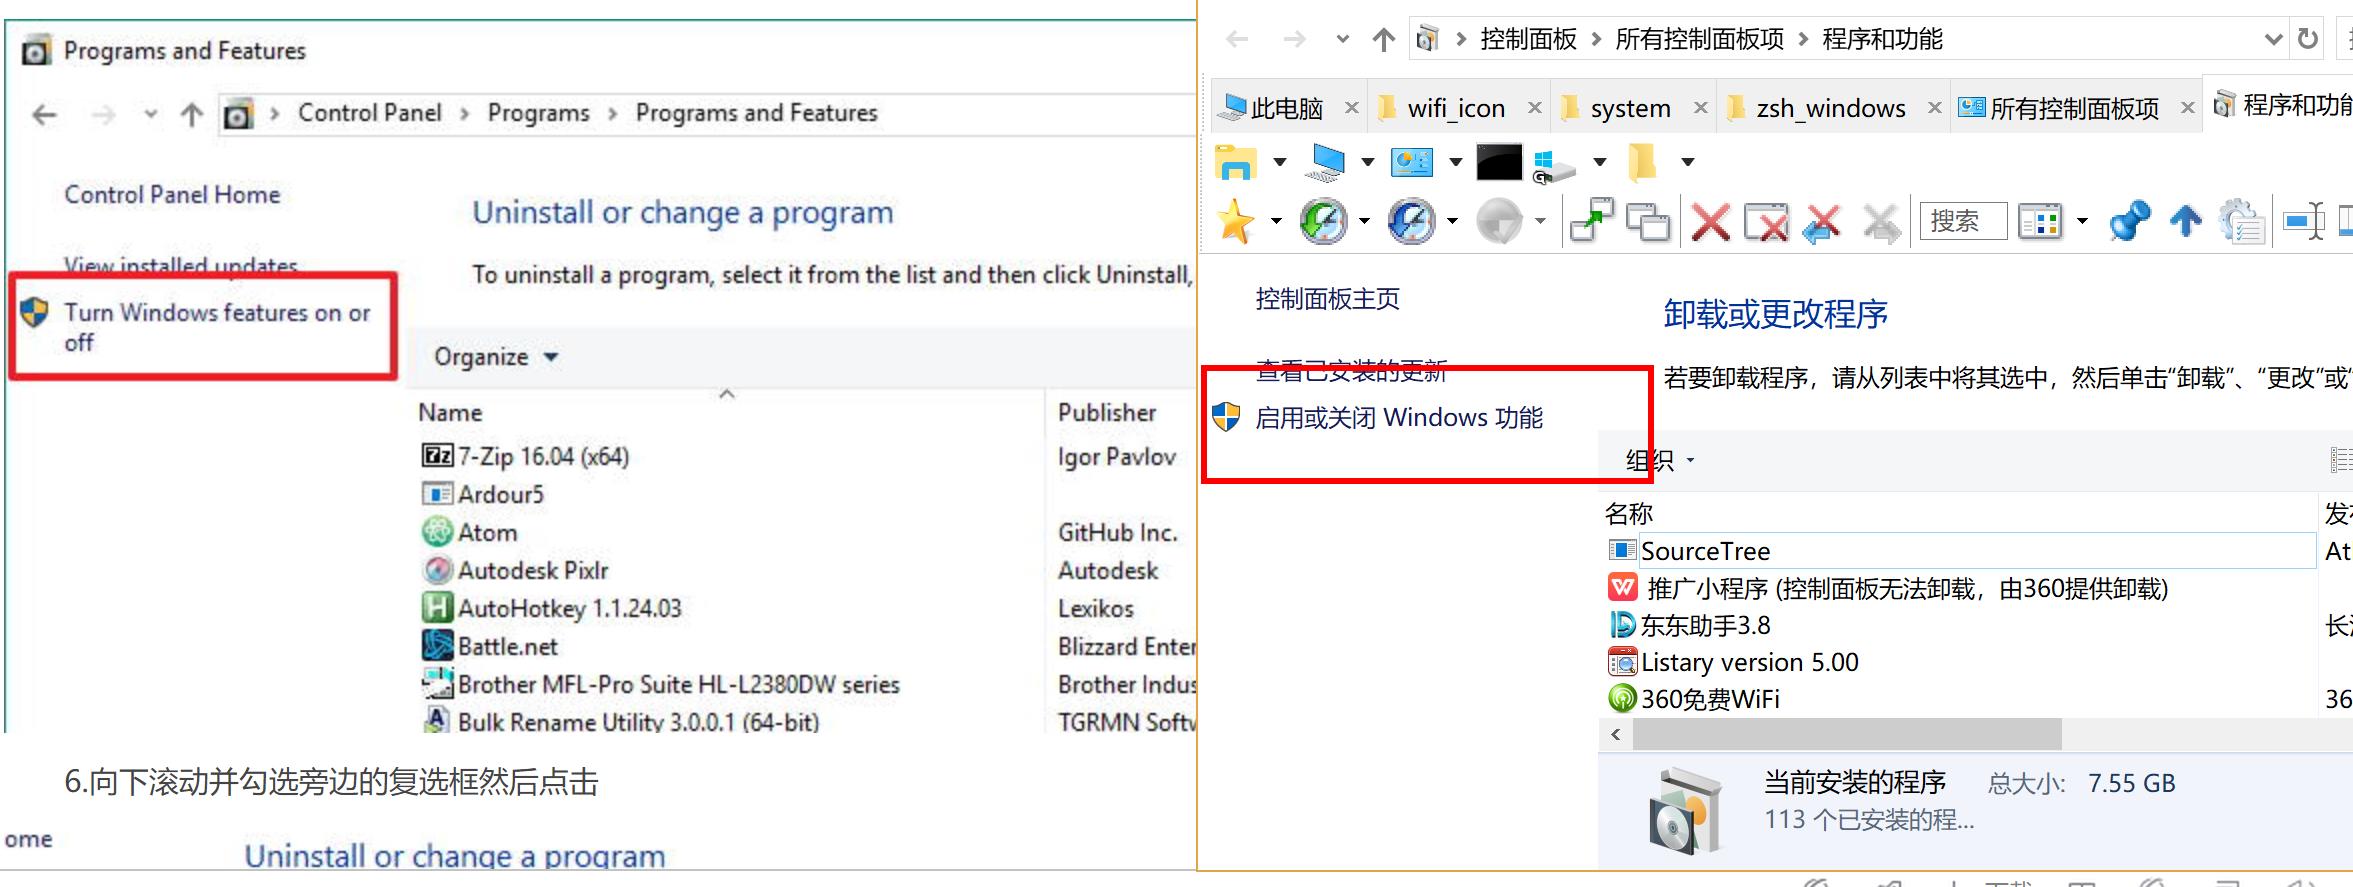
Windows功能》适用于Linux的Windows子系统
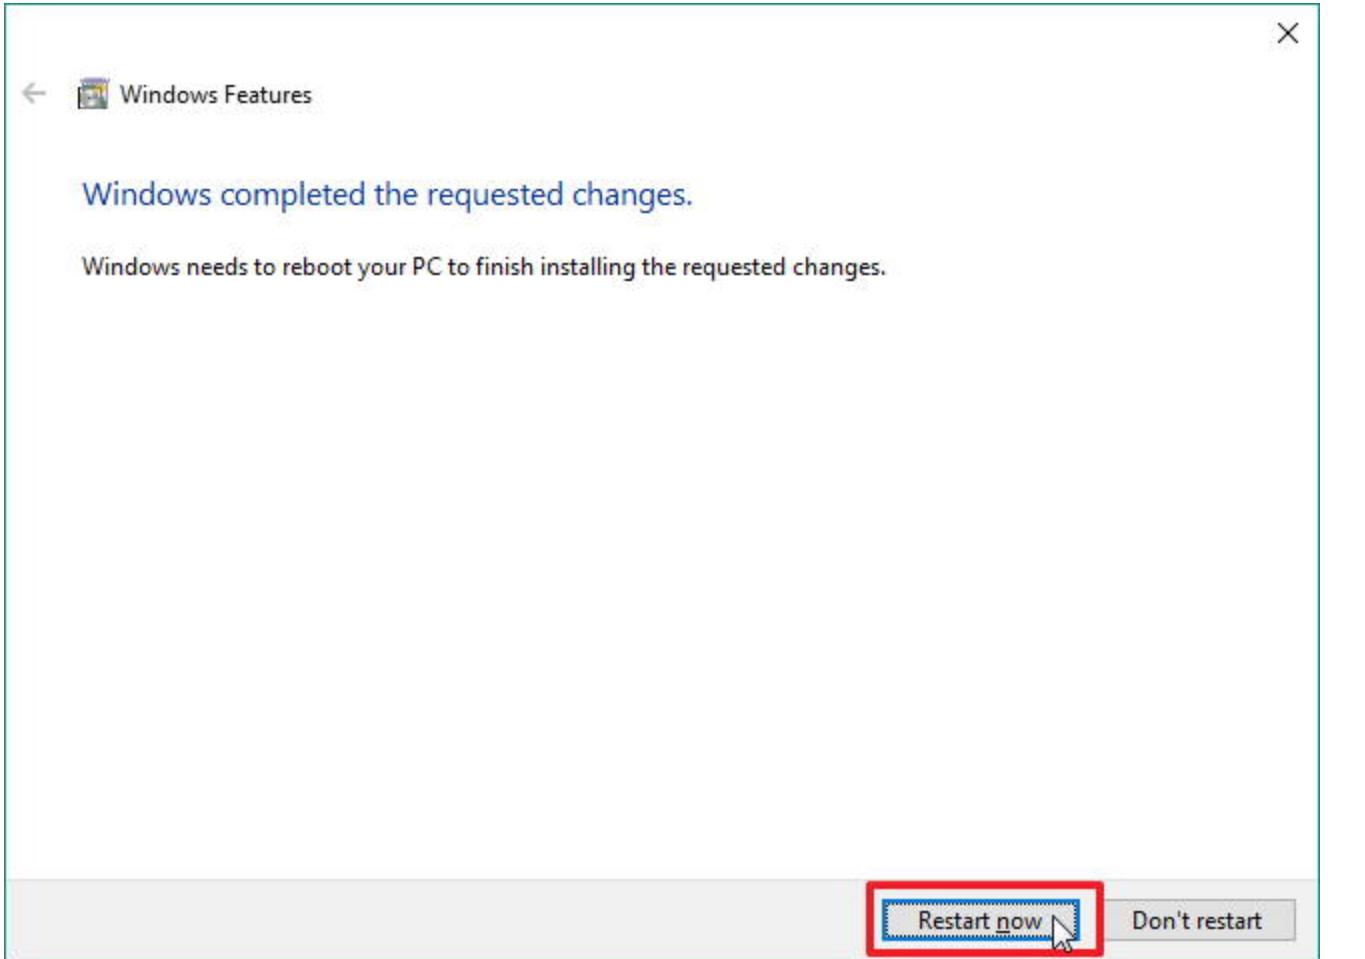
等待安装完成_重启
进入bash安装microsoft应用
运行 bash
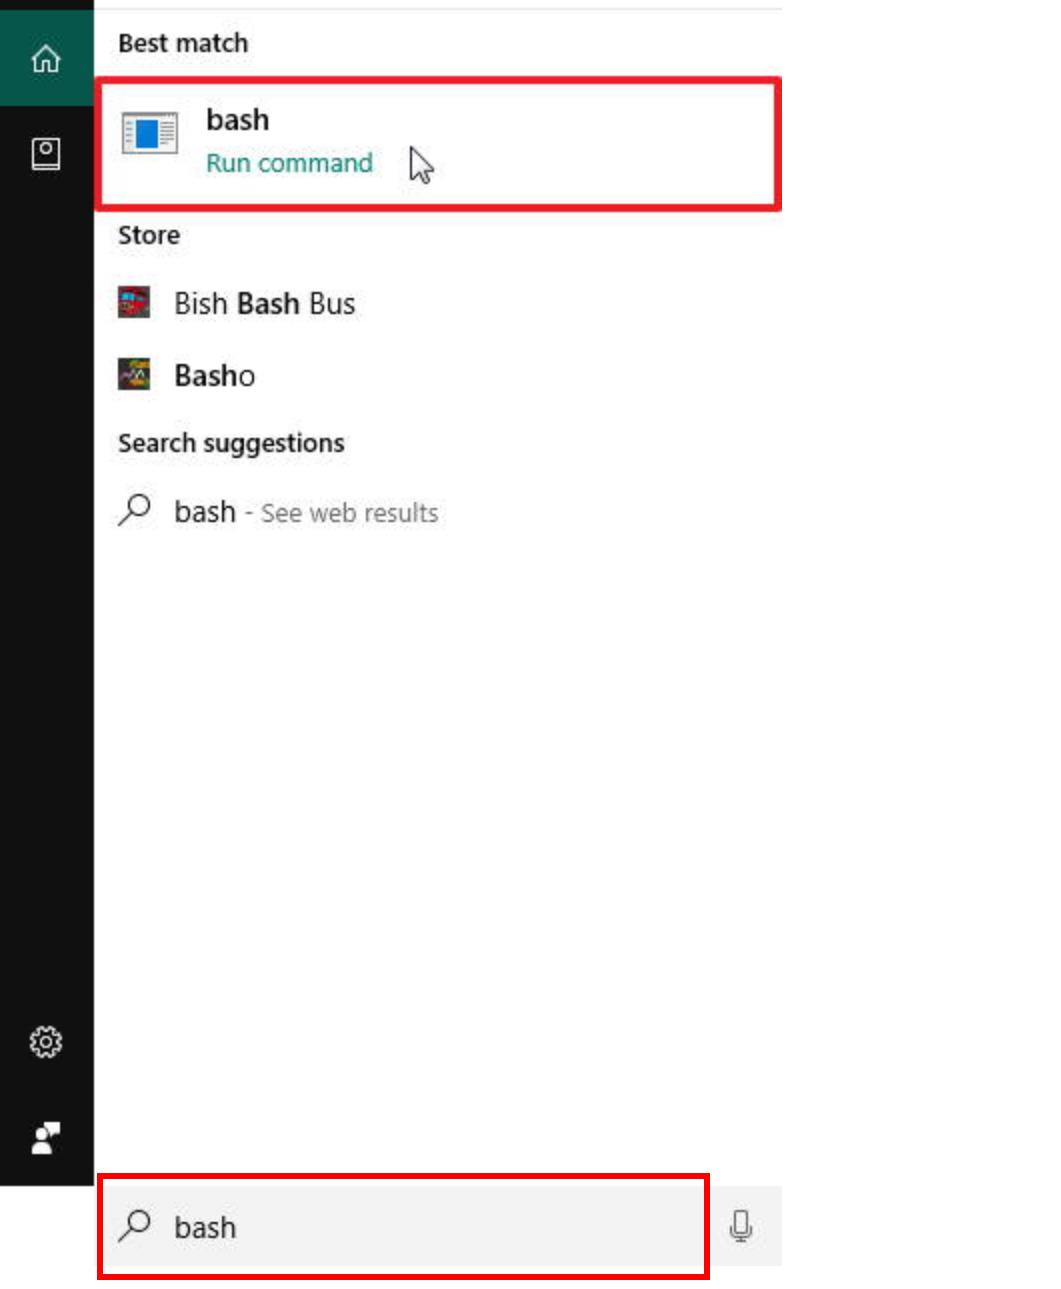
开始菜单输入   bash  , 搜到  bash 并运行


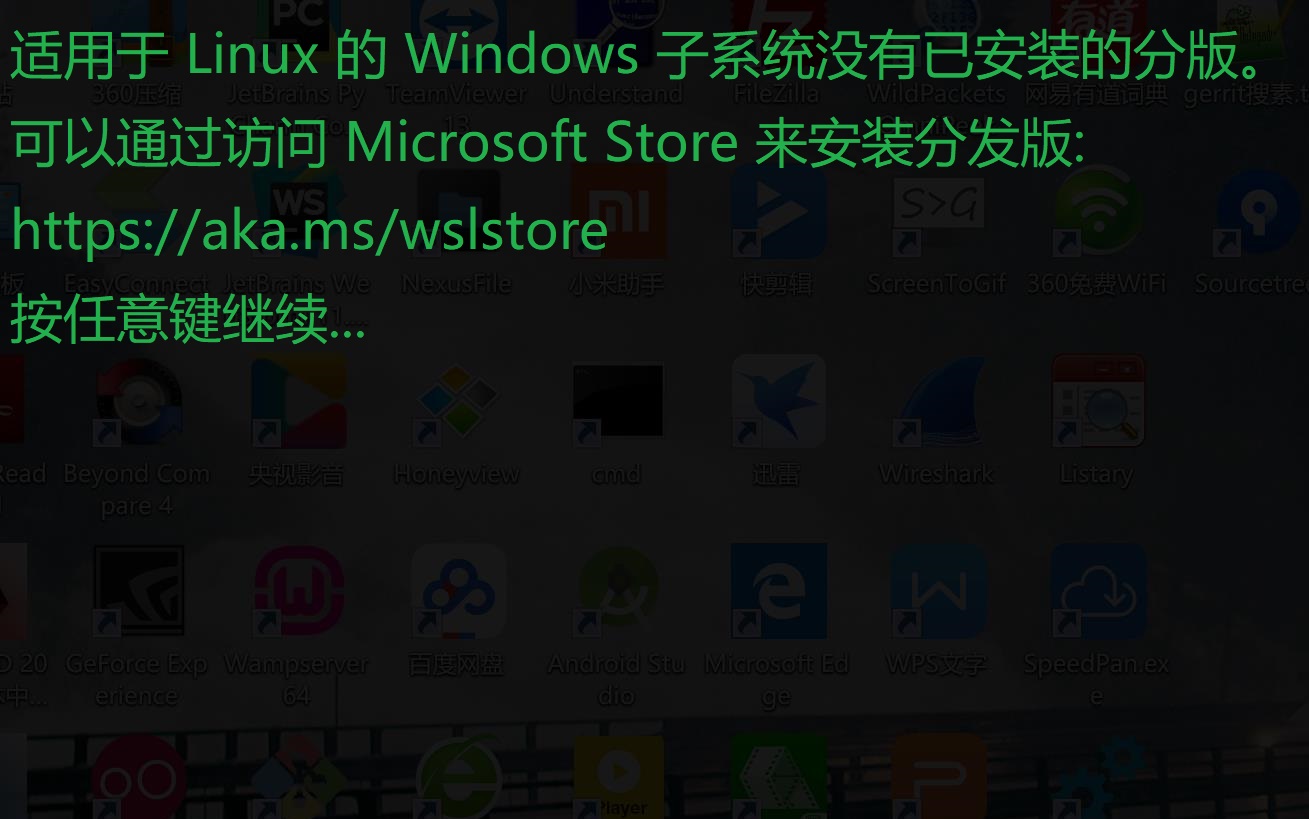
可能输出:
适用于 Linux 的 Windows 子系统没有已安装的分发版。
可以通过访问 Microsoft Store 来安装分发版:
https://aka.ms/wslstore
按任意键继续...
连接vpn 并打开微软商店
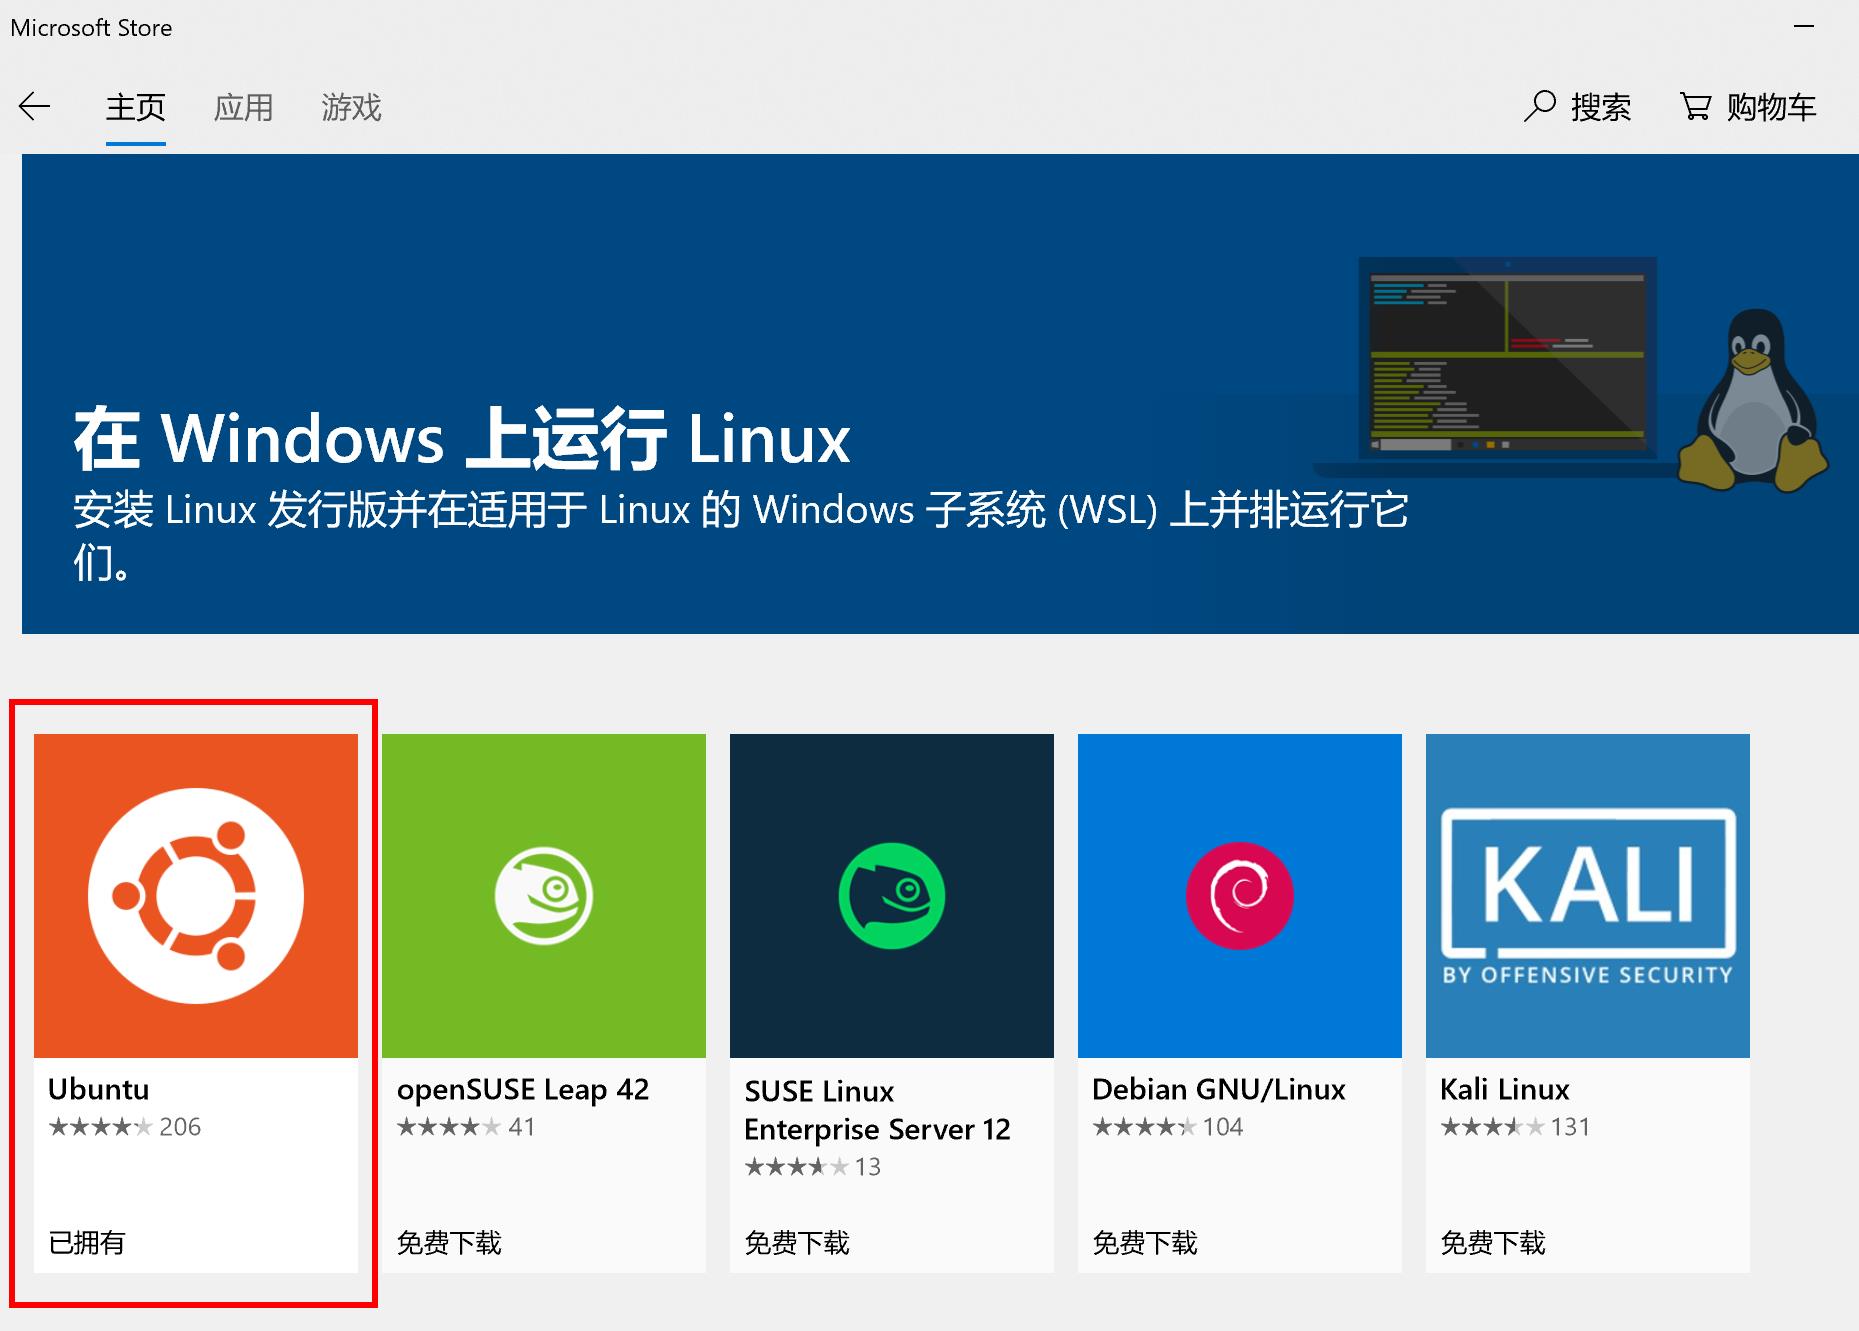
打开vpn   // 连接 微软应用商店可能需要VPN


https://aka.ms/wslstore        // 浏览器URL 打开微软应用商店
在微软商店安装Ubuntu子系统
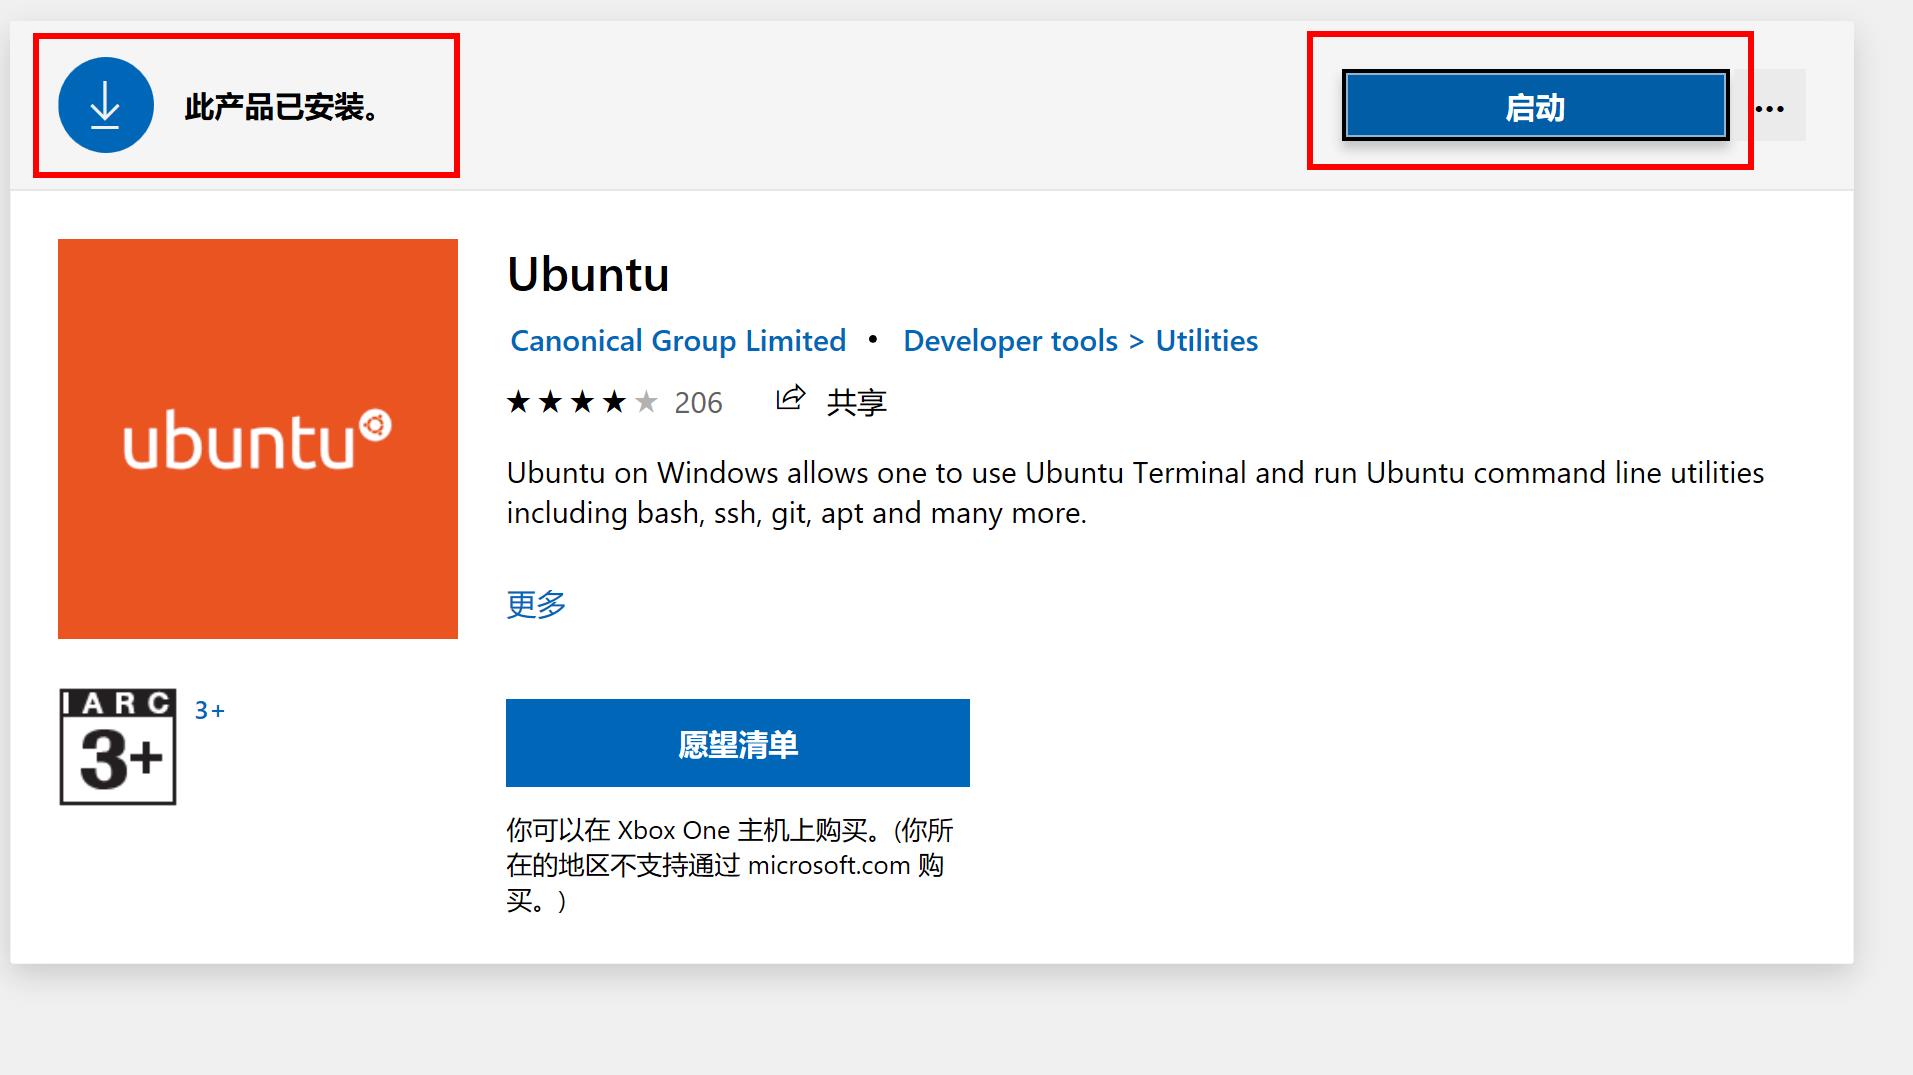
在Win菜单搜索Ubuntu并运行
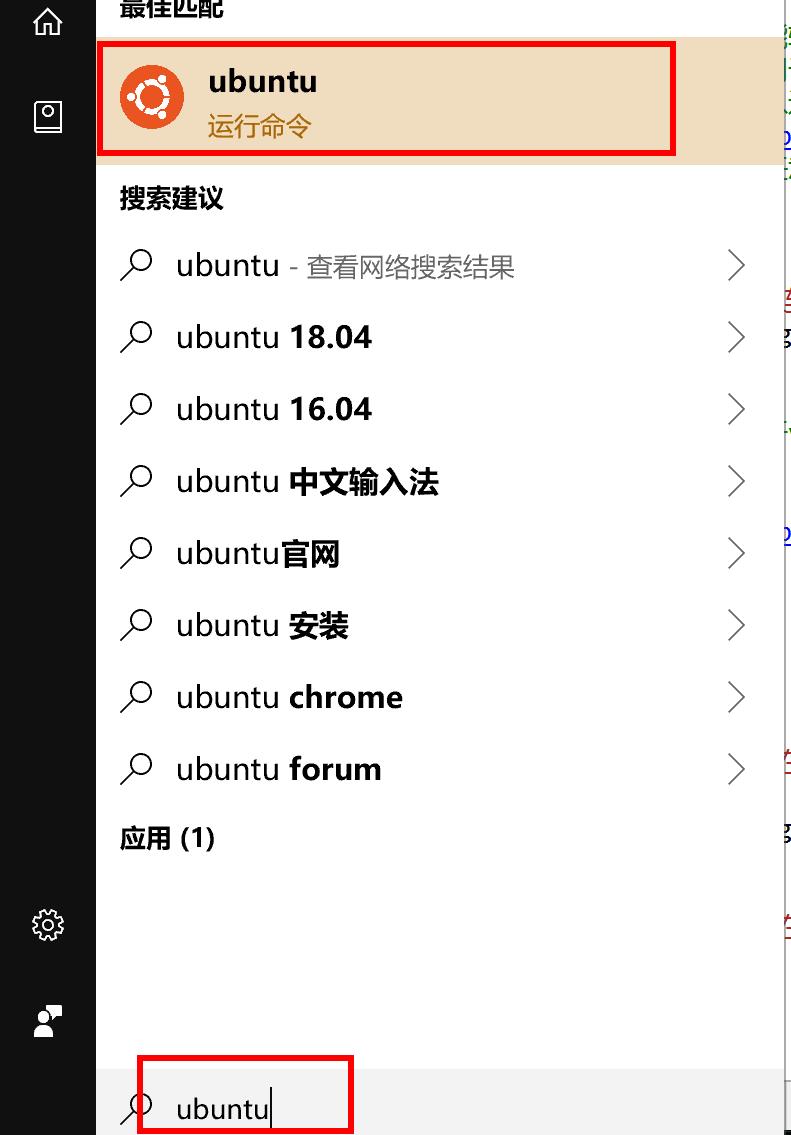
打开ubuntu的shell

第一次打开默认会配置
用户名
密码
配置默认设置项
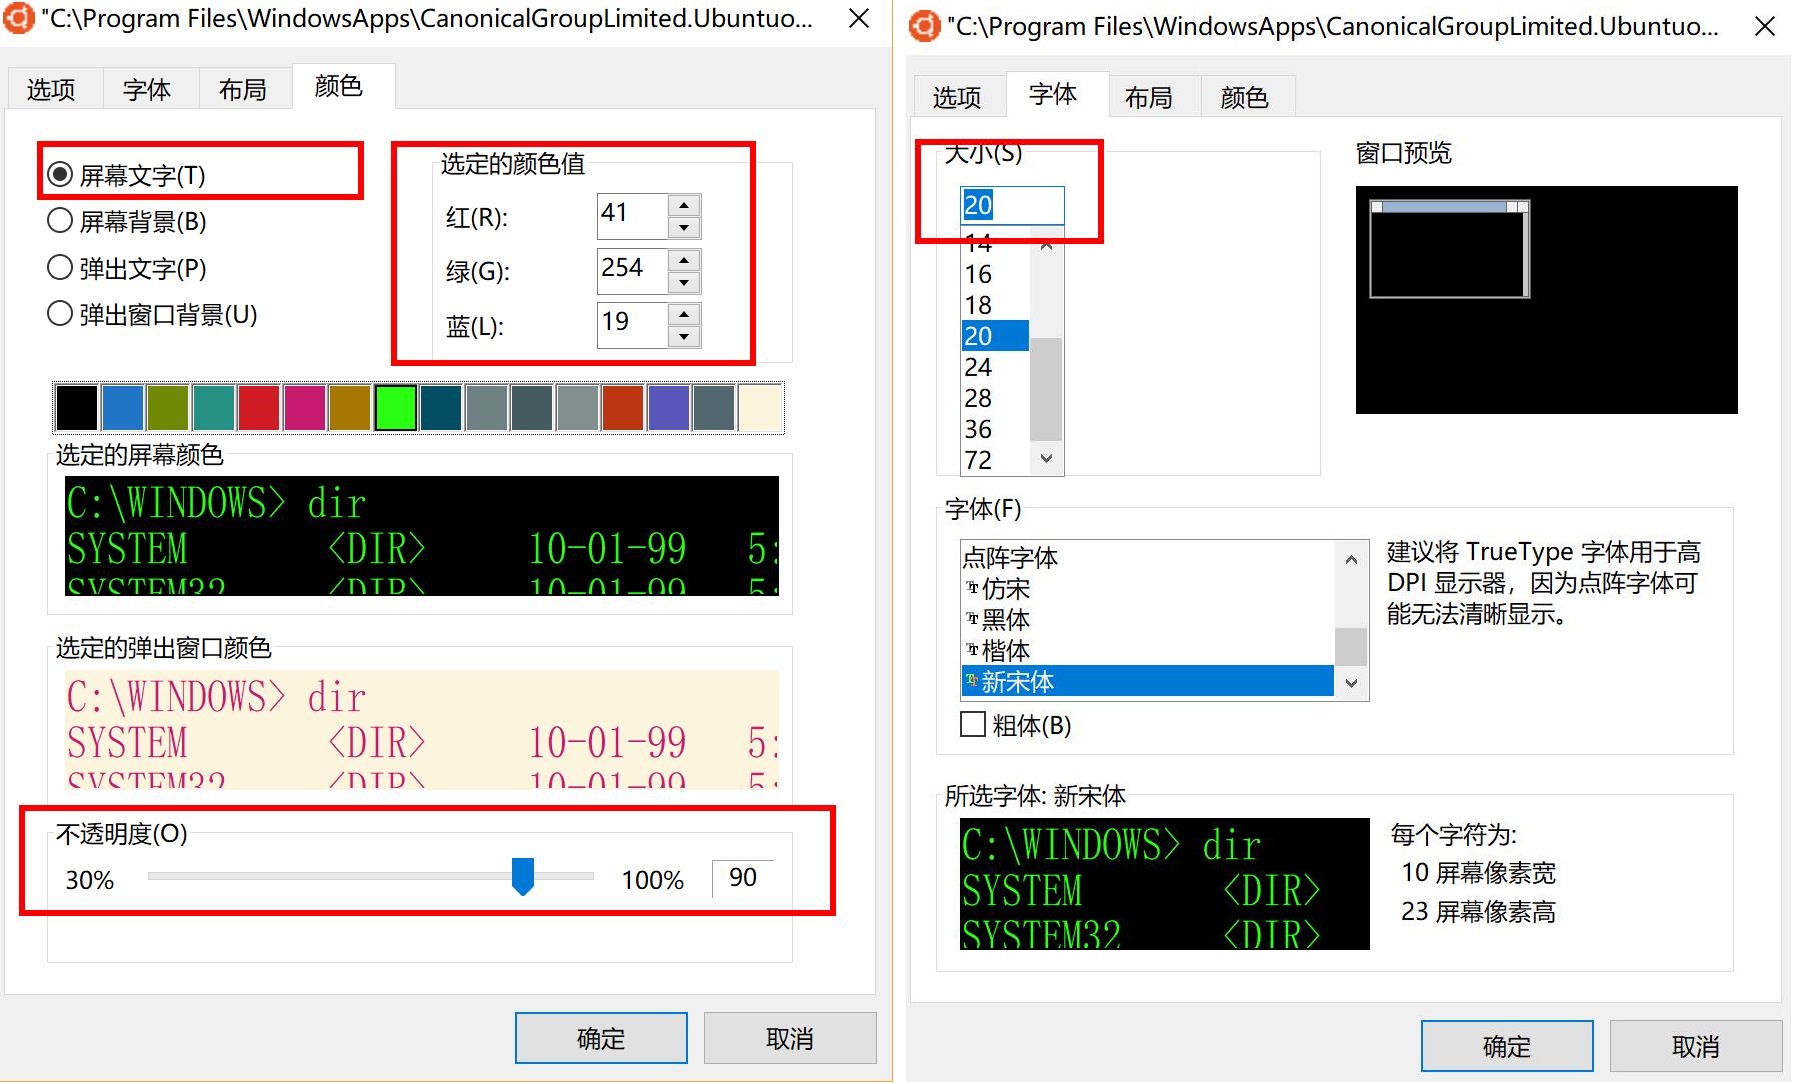
背景颜色:    R:0  G:0   B:0
文字颜色:    R:41  G:254   B:19
透明度:     90%
字体大小:    20号
安装ColorTool
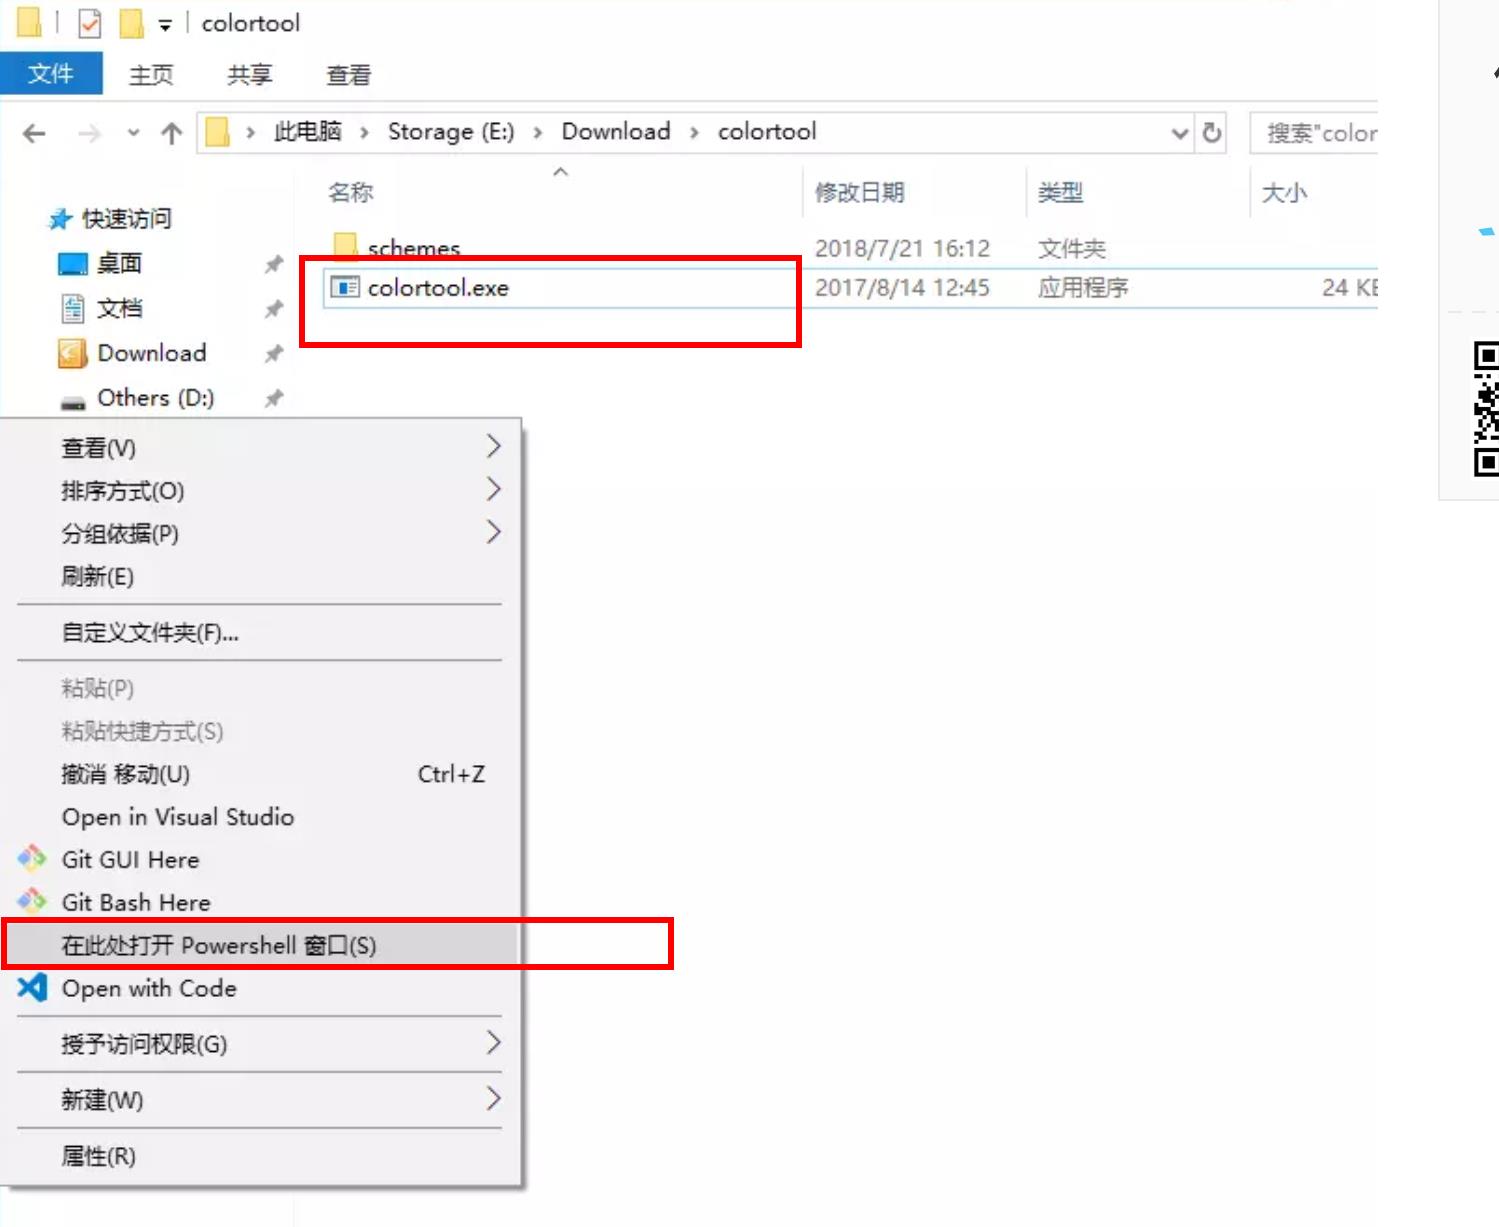
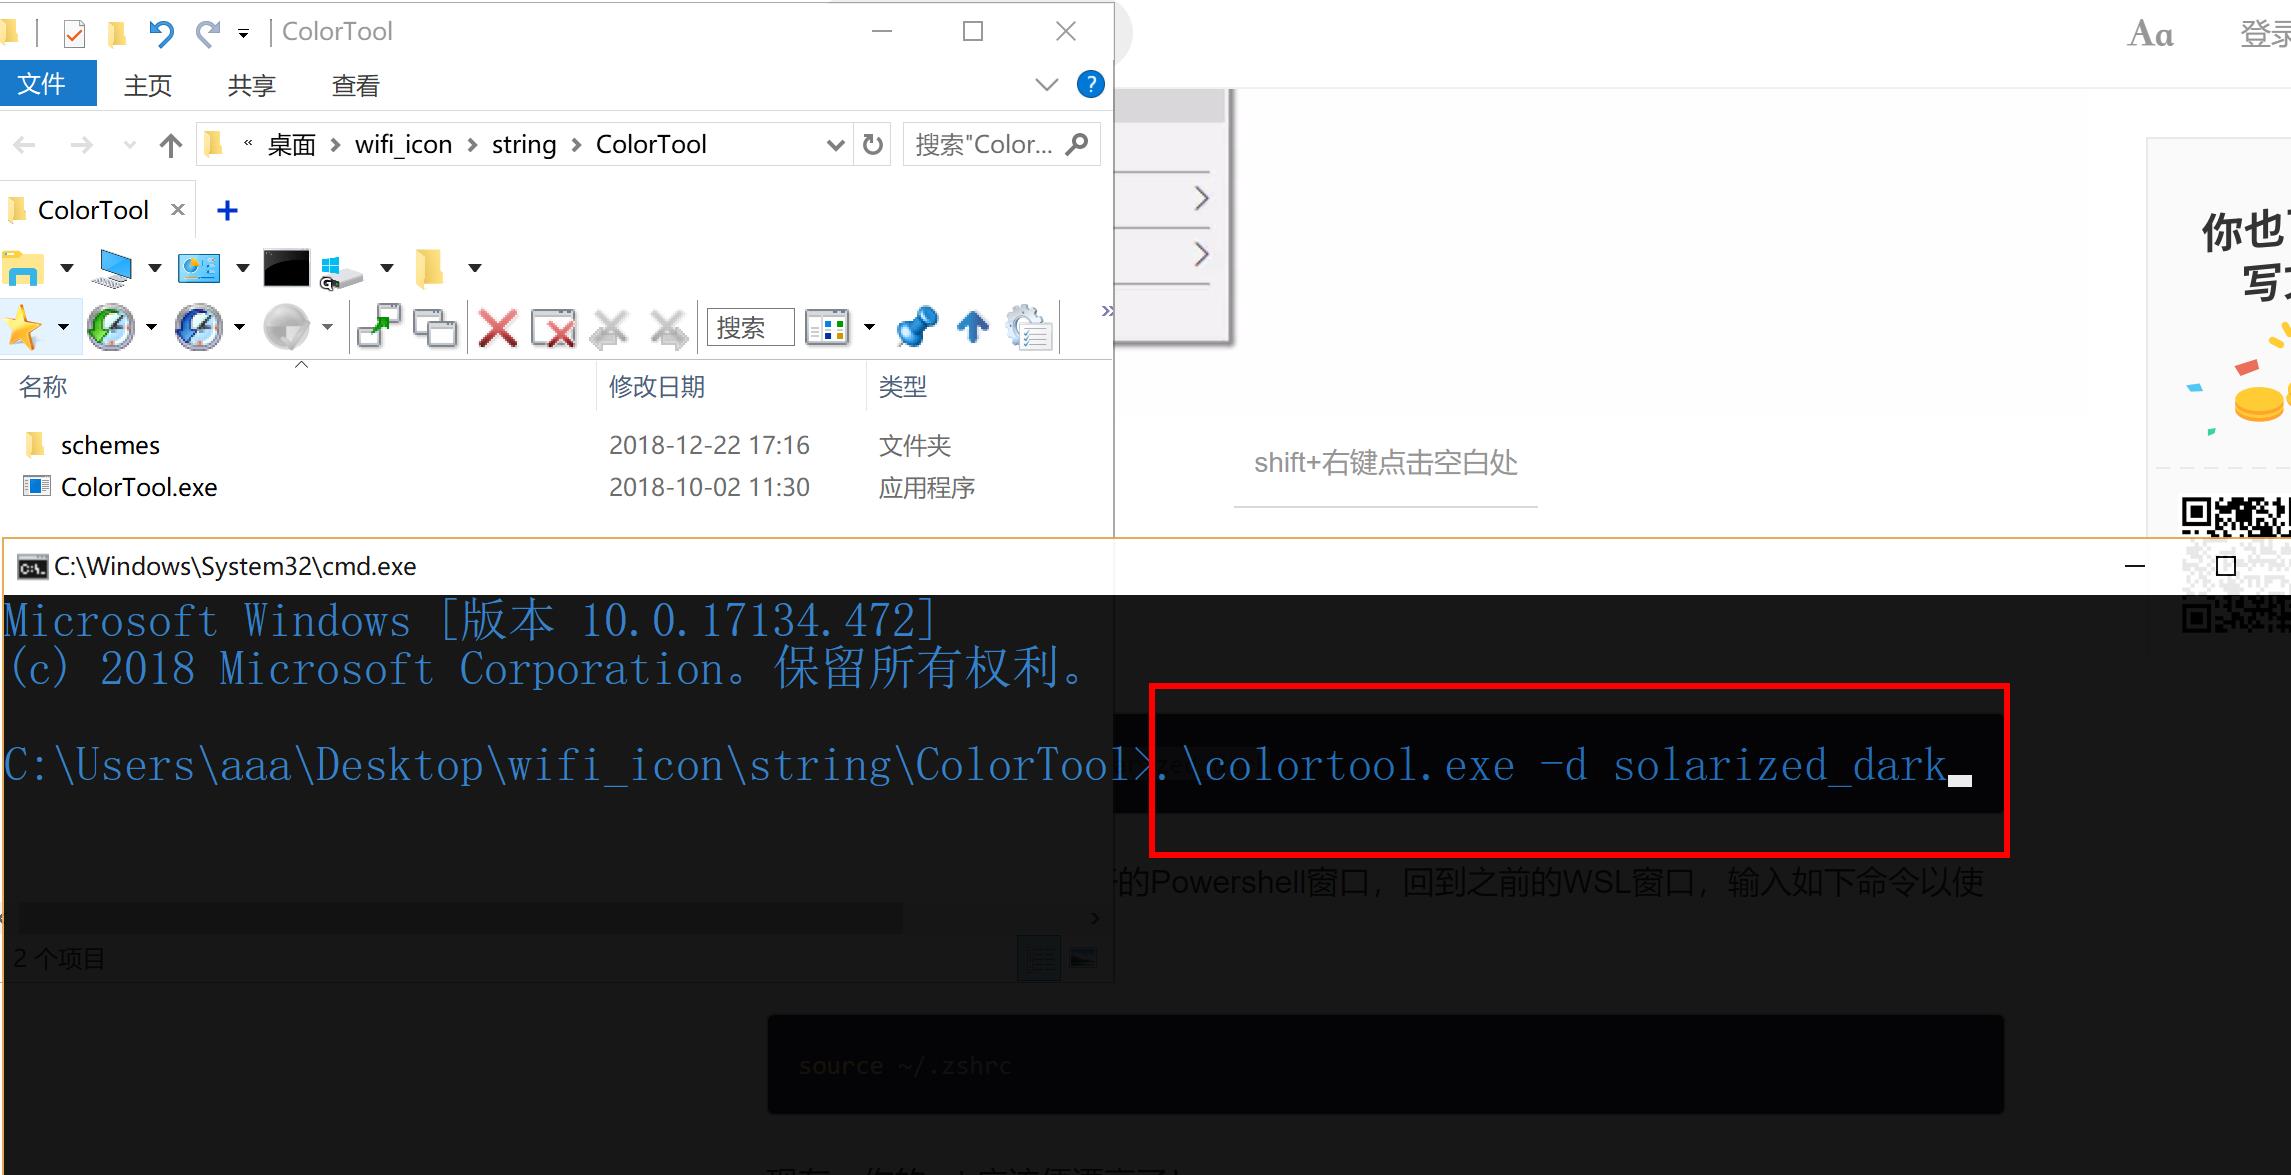
Windows默认终端的Color Theme改起来比较费劲,需要使用一个叫做colortool的工具。他是微软自带的一个修改终端配色方案的工具

ColorTool 下载地址
https://github.com/Microsoft/console/releases

CMD下执行命令:
 .\colortool.exe -d solarized_dark
 .\colortool.exe -d deuteranopia
 .\colortool.exe -d OneHalfDark
 .\colortool.exe -d OneHalfLight       【推荐】
 .\colortool.exe -d solarized_dark
 .\colortool.exe -d solarized_light
运行ubuntu 安装zsh
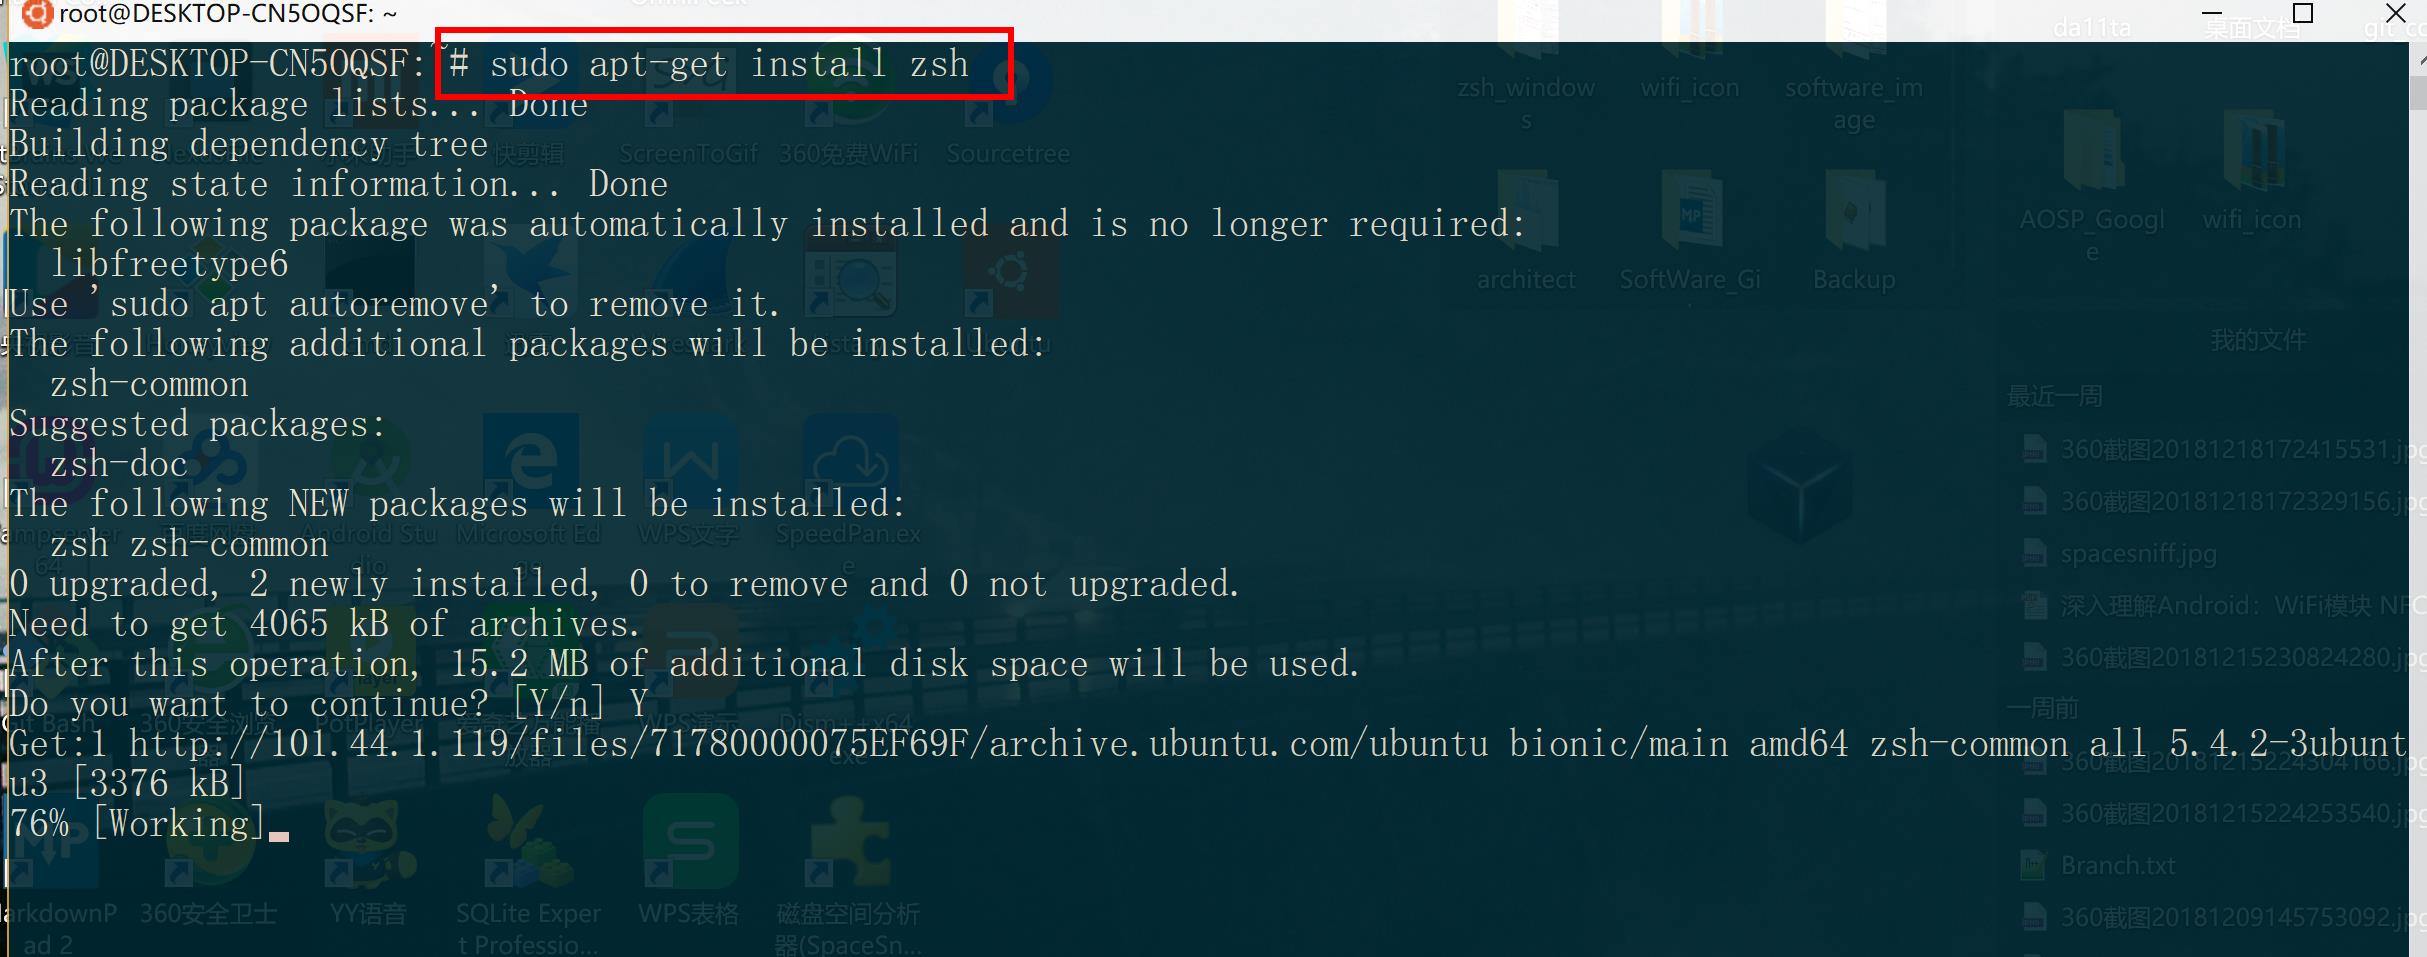
安装命令:
sudo apt-get install zsh
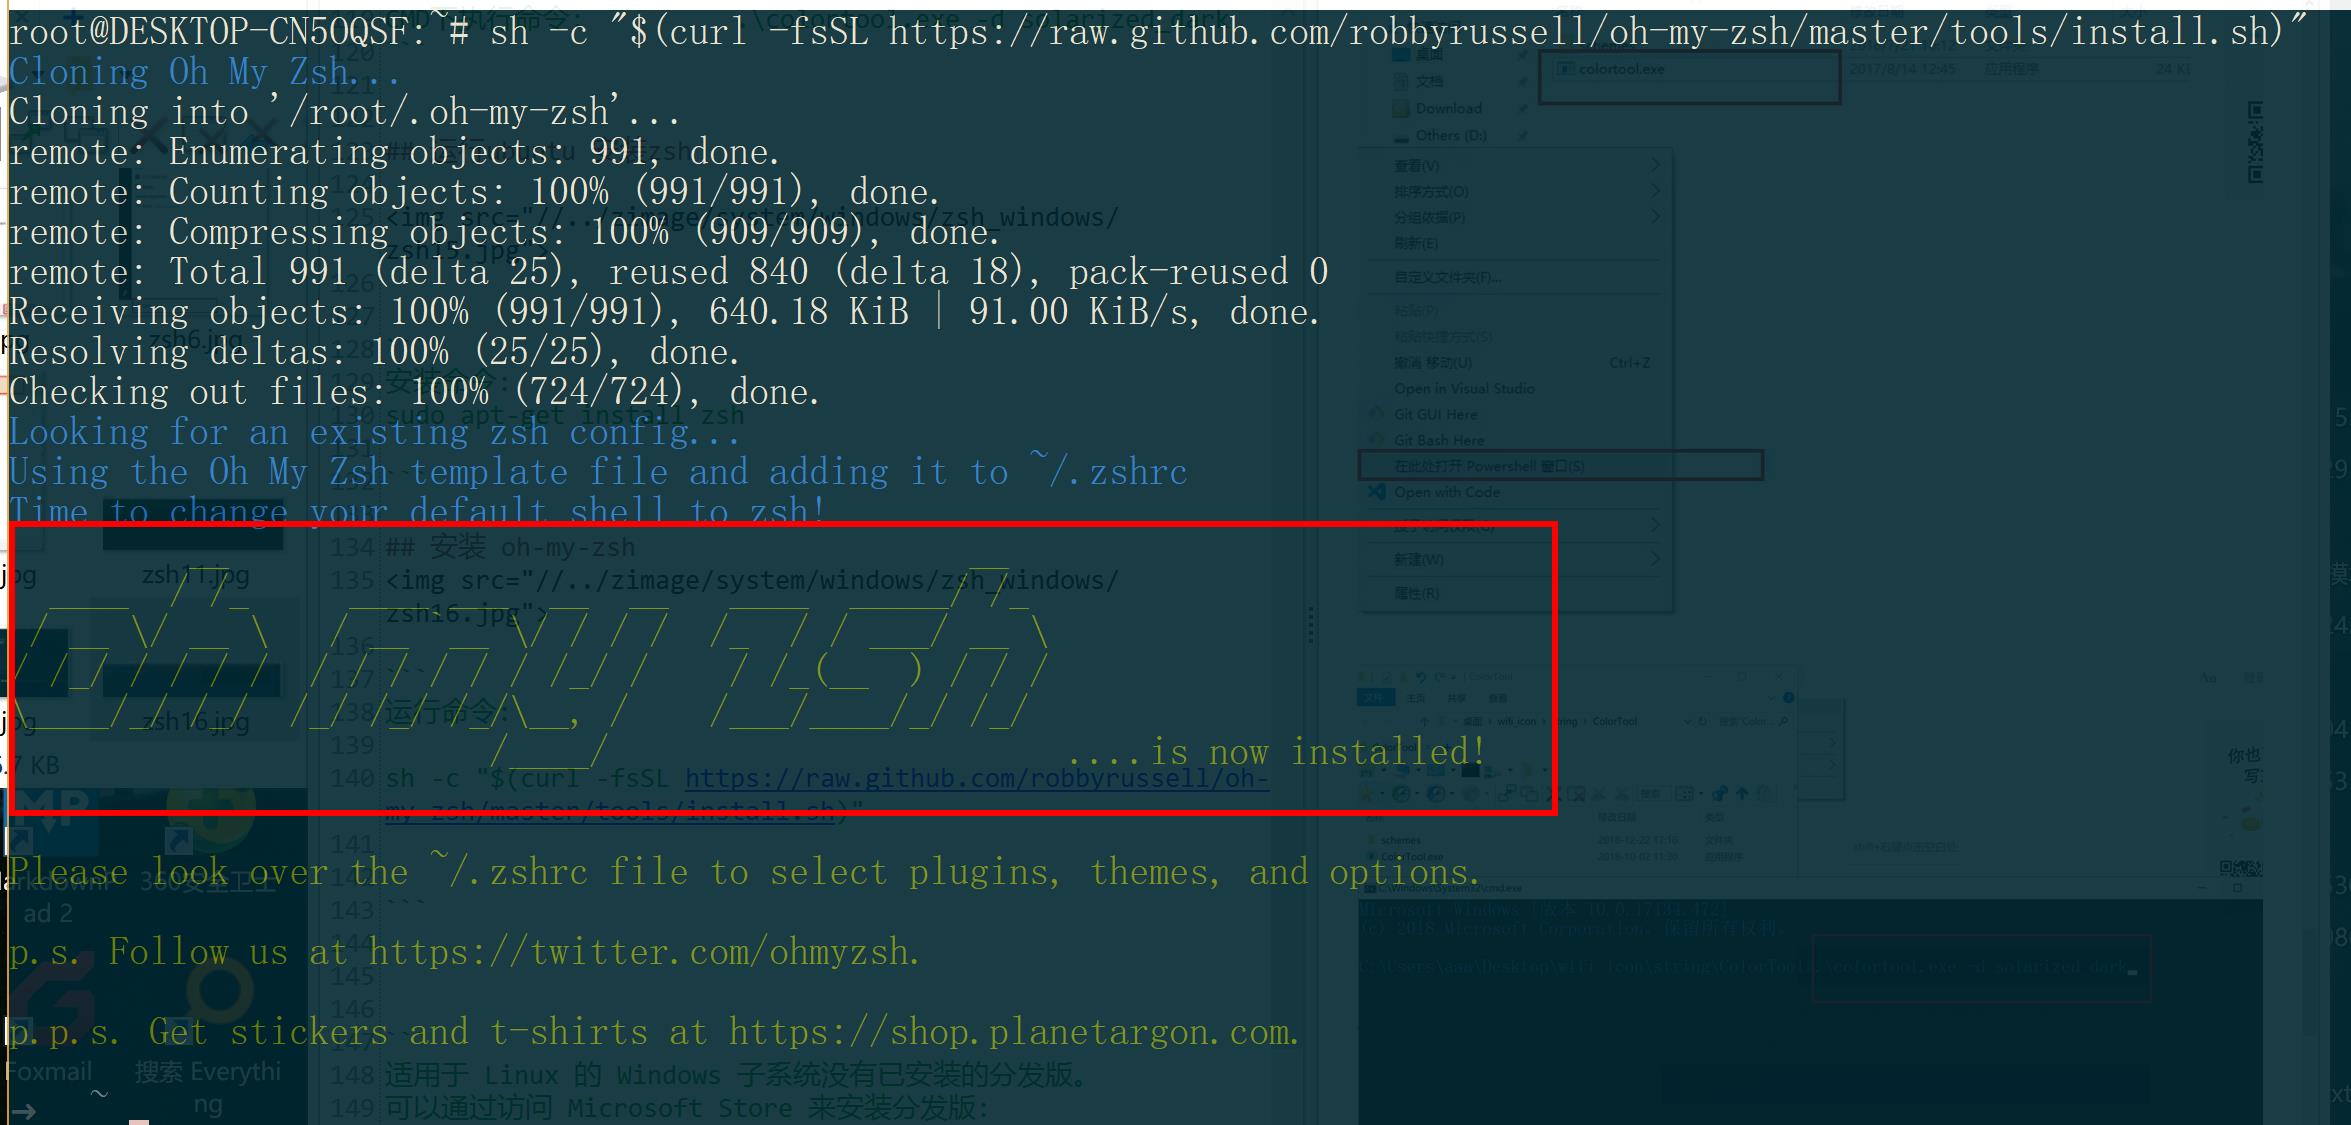
安装 oh-my-zsh

运行命令:

sh -c "$(curl -fsSL https://raw.github.com/robbyrussell/oh-my-zsh/master/tools/install.sh)"
oh-my-zsh 安装成功
查看当前路径以及目录文件
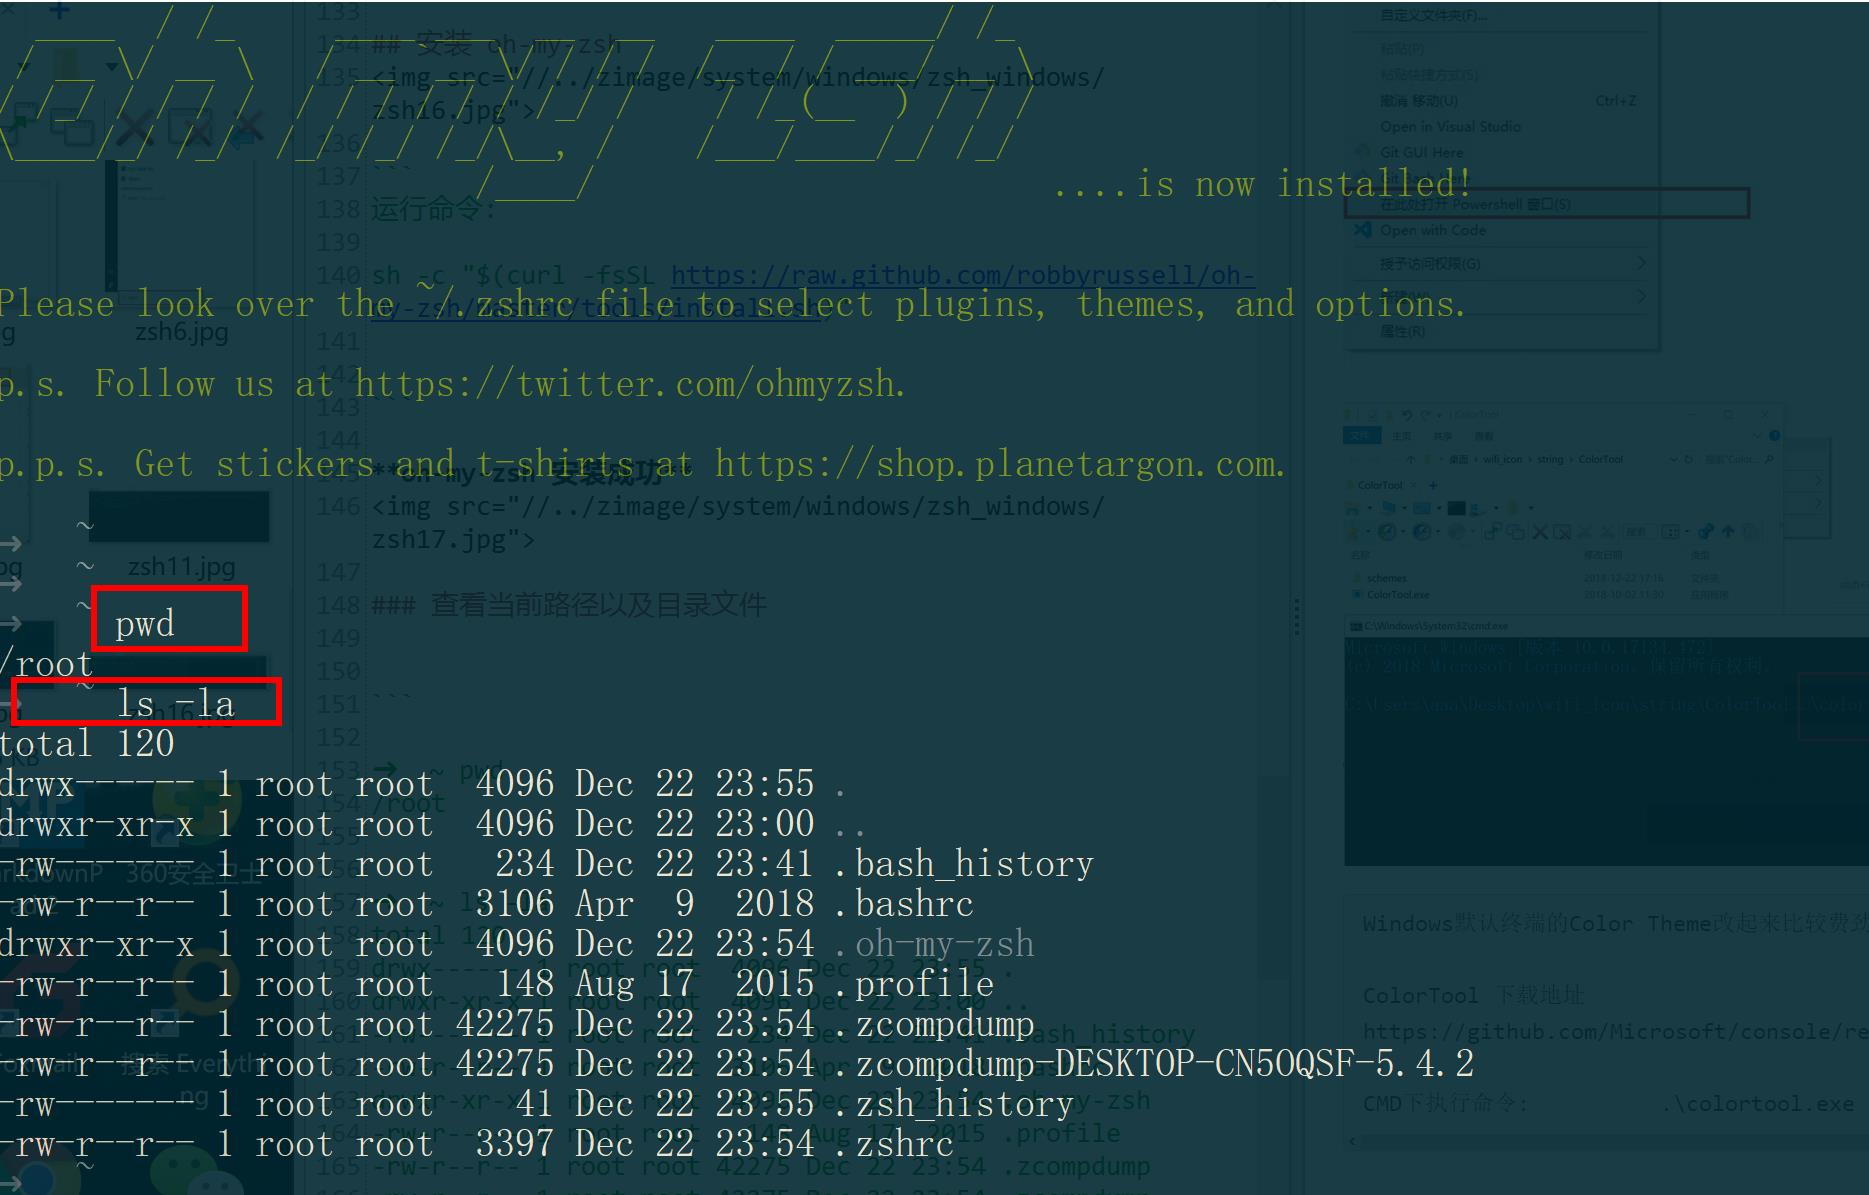
➜  ~ pwd
/root


➜  ~ ls -la
total 120
drwx------ 1 root root  4096 Dec 22 23:55 .
drwxr-xr-x 1 root root  4096 Dec 22 23:00 ..
-rw------- 1 root root   234 Dec 22 23:41 .bash_history
-rw-r--r-- 1 root root  3106 Apr  9  2018 .bashrc
drwxr-xr-x 1 root root  4096 Dec 22 23:54 .oh-my-zsh
-rw-r--r-- 1 root root   148 Aug 17  2015 .profile
-rw-r--r-- 1 root root 42275 Dec 22 23:54 .zcompdump
-rw-r--r-- 1 root root 42275 Dec 22 23:54 .zcompdump-DESKTOP-CN5OQSF-5.4.2
-rw------- 1 root root    41 Dec 22 23:55 .zsh_history
-rw-r--r-- 1 root root  3397 Dec 22 23:54 .zshrc
➜  ~
安装 antigen 管理zsh
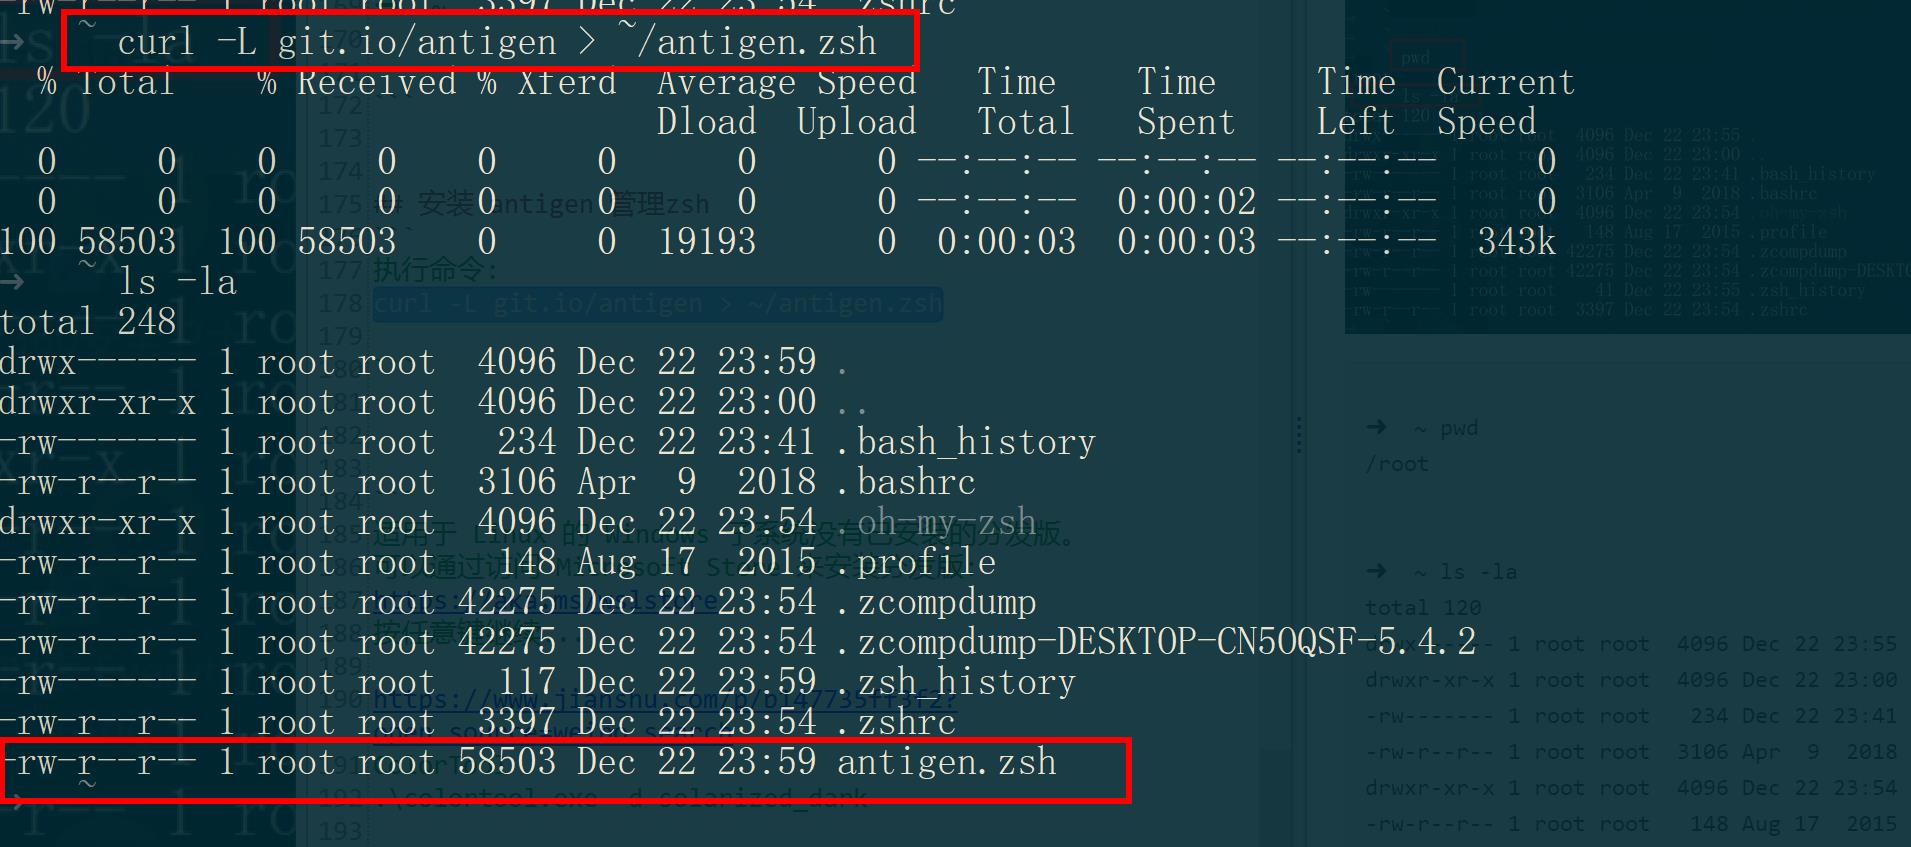
执行命令:
1.   curl -L git.io/antigen > ~/antigen.zsh

~/antigen.zsh    如果是普通用户就在 /home/user1/antigen.sh
~/antigen.zsh    如果是超级用户就在 /root/antigen.sh
配置 antigen.sh 到 ~/.zshrc
~/antigen.zsh    如果是普通用户就在 /home/user1/antigen.sh
~/antigen.zsh    如果是超级用户就在 /root/antigen.sh


~/.zshrc    如果是普通用户就在 /home/user1/.zshrc
~/.zshrc     如果是超级用户就在 /root/.zshrc

1.  cat   ~/.zshrc
## 输出:
export ZSH="/root/.oh-my-zsh"
plugins=(
  git
)

source $ZSH/oh-my-zsh.sh


2.  vim  ~/.zshrc            // 添加如下代码

###############客制化#################
alias cls="clear"

ZSH_THEME="robbyrussell"
## 执行antigen 用于初始化 antigen的环境
source     ~/antigen.zsh

## 通过 antigen 加载 oh-my-zsh库
antigen use oh-my-zsh

## 加载原版oh-my-zsh中的功能
antigen bundle git
antigen bundle heroku
antigen bundle pip
antigen bundle lein
antigen bundle command-not-found


antigen bundle zsh-users/zsh-syntax-highlighting  #语法高亮功能
antigen bundle zsh-users/zsh-autosuggestions   #代码提示功能
antigen bundle zsh-users/zsh-completions   #自动补全功能

# 加载主题为 Fishy2   af-magic
##zsh主题地址    https://github.com/robbyrussell/oh-my-zsh/wiki/External-themes
##zsh主题地址    https://github.com/robbyrussell/oh-my-zsh/wiki/themes
antigen theme robbyrussell/oh-my-zsh themes/af-magic
antigen apply     # 保存当前设置 并进行生效设置

#修改 shell的行提示符
PS1="[zukgit的MacPro-\`pwd\`]${ret_status} %{$fg[cyan]%}%c%{$reset_color%} $(git_prompt_info)"


3.执行语句

chmod -R 755 ~/.antigen
chmod -R 755 ~/


4. 重启 Ubuntu
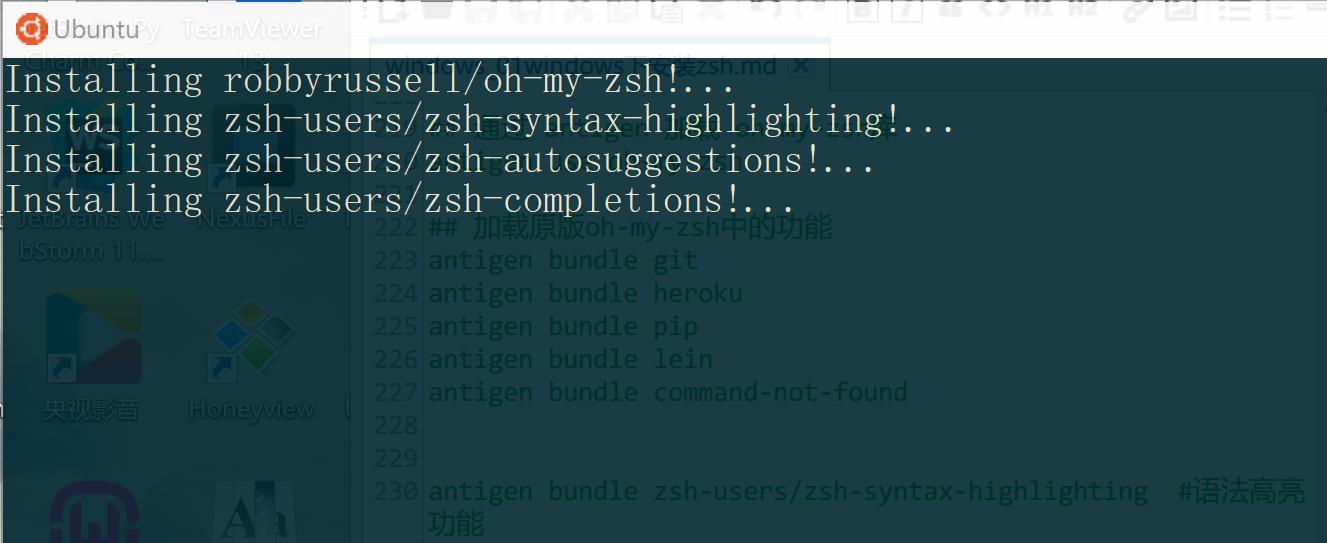
Windows子系统Ubuntu安装ADB
对比Windows版本与Ubuntu版本
Windows CMD 下 adb 的版本  和 Ubuntu下ADB 的 版本必须保持一致  否则在Ubuntu下无法使用 ADB连接到 device

Windows版本:
C:\Users\aaa>adb version
Android Debug Bridge version 1.0.31

Ubuntu版本:
adb version
Android Debug Bridge version 1.0.36
Revision 1:7.0.0+r33-2
下载ADB版本
下载ADB版本必须确保 Windows 和 Ubuntu下的版本相同
Windows ADB 下载地址: https://github.com/ZukGit/SoftWare_Resource/tree/master/Windows/ADB_Tool

ADB_1_0_26_windows
ADB_1_0_31_windows
ADB_1_0_32_windows
ADB_1_0_36_windows
ADB_1_0_39_windows
ADB_1_0_40_windows


---------------------------------------

Linux ADB 下载地址: https://github.com/ZukGit/SoftWare_Resource/tree/master/Linux/ADB_Tool

ADB_1_0_39_linux         【1.0.39版本】
安装步骤
Windows安装步骤
下载ADB 版本
Windows ADB 下载地址: https://github.com/ZukGit/SoftWare_Resource/tree/master/Windows/ADB_Tool
1.  我的电脑》属性》高级系统设置》环境变量》Path      【+】按钮  添加 adb.exe 的路径
2.   CMD 下   adb version         //  查看是否安装成功
Linux的安装步骤
ADB 1.0.36 for Linux
sudo add-apt-repository ppa:nilarimogard/webupd8
sudo apt-get update
sudo apt-get install android-tools-adb

adb version
Android Debug Bridge version 1.0.36
Revision 1:7.0.0+r33-2

卸载ADB
sudo apt-get remvoe android-tools-adb
sudo apt remvoe adb
ADB 1.0.39 for Linux
sudo apt-get remove android-tools-adb                    //  首先卸载安装的ADB
sudo apt-get remove adb                                  // 完全卸载 adb
https://github.com/ZukGit/SoftWare_Resource/tree/master/Windows/ADB_Tool      // 下载 adb 到本地(git 收藏) ADB_1_0_39_linux
sudo cp ./adb /usr/bin/adb

adb version     // 运行该命令  查看是否成功安装
Android Debug Bridge version 1.0.39
Version 0.0.0-4634796
Installed as /usr/bin/adb
参考文档路径
适用于 Linux 的 Windows 子系统没有已安装的分发版。
可以通过访问 Microsoft Store 来安装分发版:
https://aka.ms/wslstore
按任意键继续...

https://www.jianshu.com/p/b147735ff3f2?open_source=weibo_search
ColorTool
.\colortool.exe -d solarized_dark


https://www.2cto.com/kf/201803/734030.html
lxrun /install /y


https://github.com/zsh-users/antigen

sh -c "$(curl -fsSL https://raw.github.com/robbyrussell/oh-my-zsh/master/tools/install.sh)"

curl -L git.io/antigen > ~/antigen.zsh


适用于 Linux 的 Windows 子系统没有已安装的分发版。
可以通过访问 Microsoft Store 来安装分发版:
https://aka.ms/wslstore
按任意键继续...


如何在Windows 10中安装zsh和哦我的Zsh
http://mos86.com/61530.html


antigen theme robbyrussell/oh-my-zsh themes/apple
